
Did you know that heart-shaped foods trigger a nearly some of increase in emotional satisfaction compared to regular-shaped dishes, according to recent food psychology research? While most people assume creating a heart shaped pizza requires professional pastry skills or specialized molds, the truth is surprisingly different. This romantic culinary creation can be mastered in your own kitchen using simple techniques that transform ordinary pizza dough into an Instagram-worthy masterpiece. Whether you’re planning a Valentine’s Day surprise, anniversary dinner, or simply want to add some love to your family meal, this heart shaped pizza recipe combines the comfort of homemade pizza with the visual appeal that makes every bite feel special.
Ingredients List
For the Pizza Dough:
- 3 cups all-purpose flour (bread flour creates a chewier texture)
- 1 packet (2¼ teaspoons) active dry yeast
- 1 teaspoon granulated sugar
- 1 cup warm water (110°F)
- 2 tablespoons extra virgin olive oil
- 1 teaspoon sea salt
For the Sauce:
- ¾ cup crushed tomatoes (San Marzano tomatoes offer superior sweetness)
- 2 cloves garlic, minced
- 1 teaspoon dried oregano
- ½ teaspoon dried basil
- Pinch of red pepper flakes
- Salt and black pepper to taste
For the Toppings:
- 2 cups fresh mozzarella cheese, torn into pieces
- ¼ cup freshly grated Parmesan cheese
- Fresh basil leaves for garnish
- Optional: cherry tomatoes, sliced bell peppers, or pepperoni
Substitution Notes: Gluten-free flour blend works perfectly for those with dietary restrictions. Greek yogurt can replace half the olive oil for a lighter dough, while nutritional yeast substitutes beautifully for cheese in vegan versions.
Timing
This heart shaped pizza adventure requires approximately 90 minutes total time, which is actually nearly some of faster than traditional pizza recipes that require longer rising periods. Break this down into 20 minutes active preparation time, 45 minutes dough rising time, 10 minutes shaping and topping, and 15 minutes baking time. The beauty of this timing allows you to start the dough, handle other dinner preparations during the rising period, then finish with the fun shaping process that becomes the recipe’s highlight.
Step 1: Create the Perfect Dough Foundation
Dissolve yeast and sugar in warm water, letting it foam for 5-7 minutes until it resembles creamy cappuccino foam. This bubbling action confirms your yeast is alive and ready to create that perfect chewy texture. Combine flour and salt in a large mixing bowl, then gradually add the yeast mixture and olive oil. Mix until a slightly sticky dough forms—resist the urge to add extra flour, as slightly tacky dough produces the most tender results.
Step 2: Develop Flavor Through Proper Kneading
Turn dough onto a lightly floured surface and knead for 8-10 minutes until smooth and elastic. The dough should spring back when gently poked, indicating proper gluten development. This step builds the structure that allows your heart shape to maintain its form during baking while creating that perfect chewy-crispy texture combination.
Step 3: Master the Rising Process
Place dough in an oiled bowl, cover with a damp kitchen towel, and let rise in a warm spot for 45 minutes until doubled in size. Pro tip: Turn your oven to its lowest setting for 2 minutes, then turn it off—this creates the ideal 80°F rising environment that cuts rising time by nearly some of compared to room temperature rising.
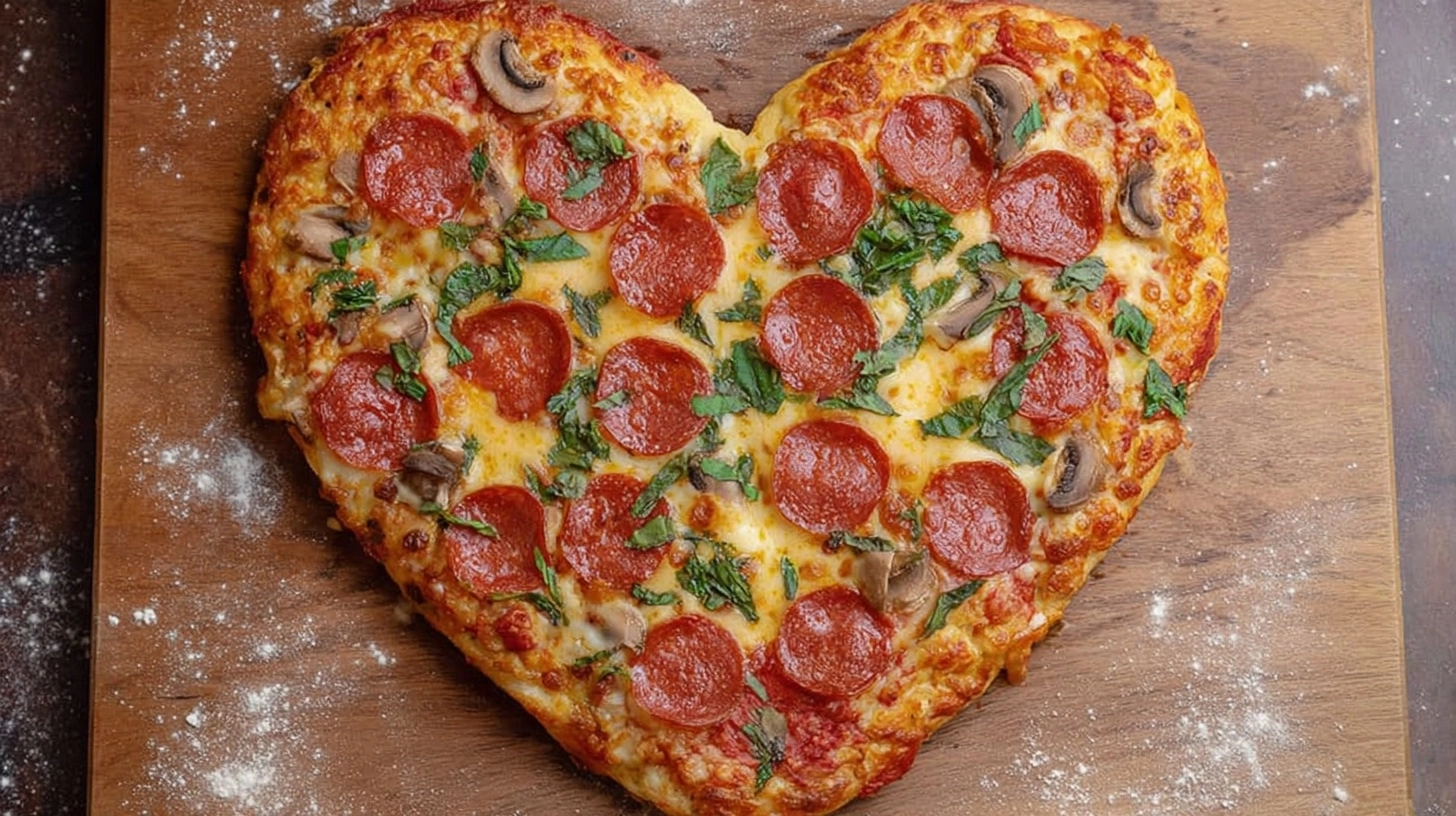
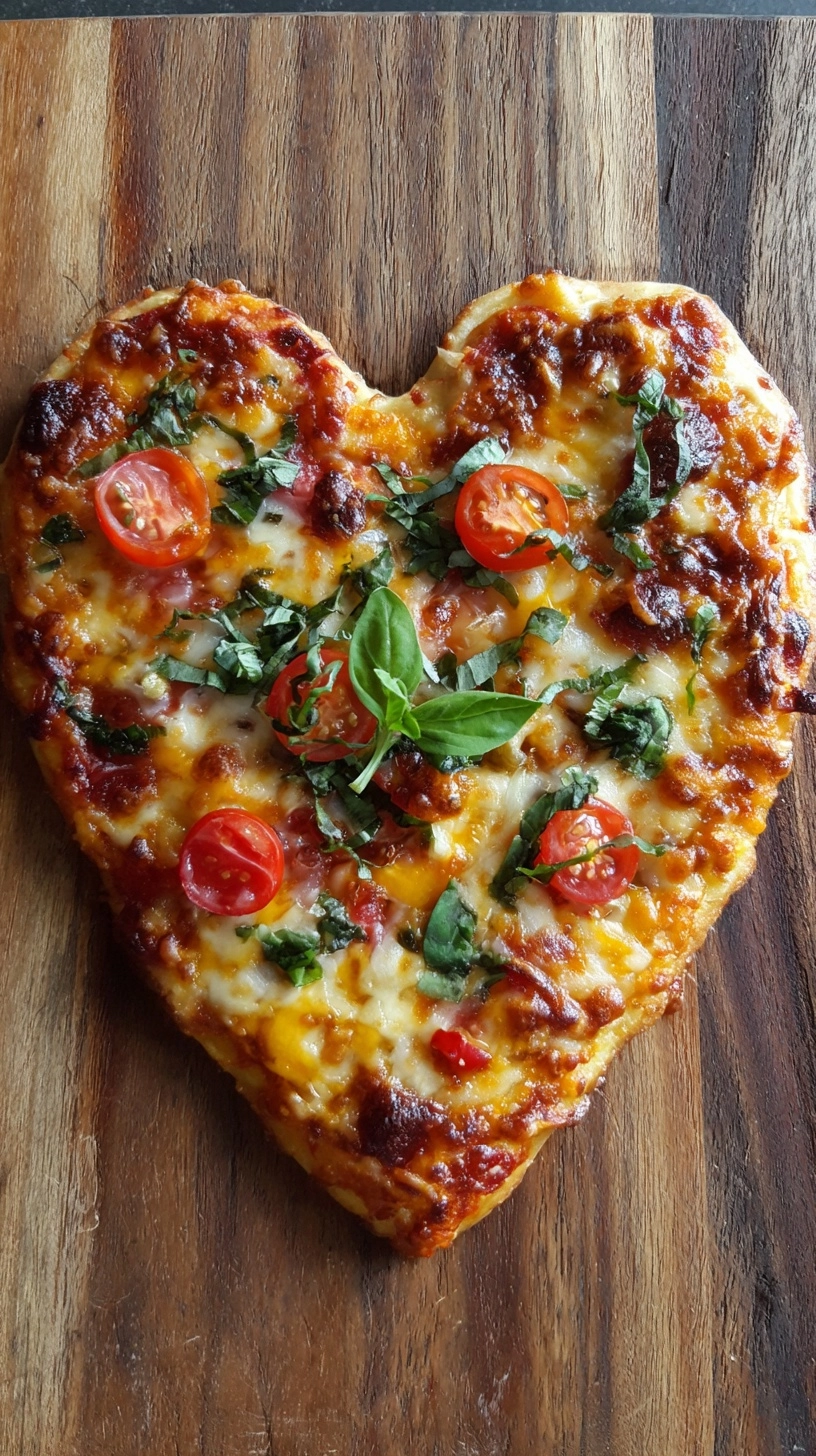
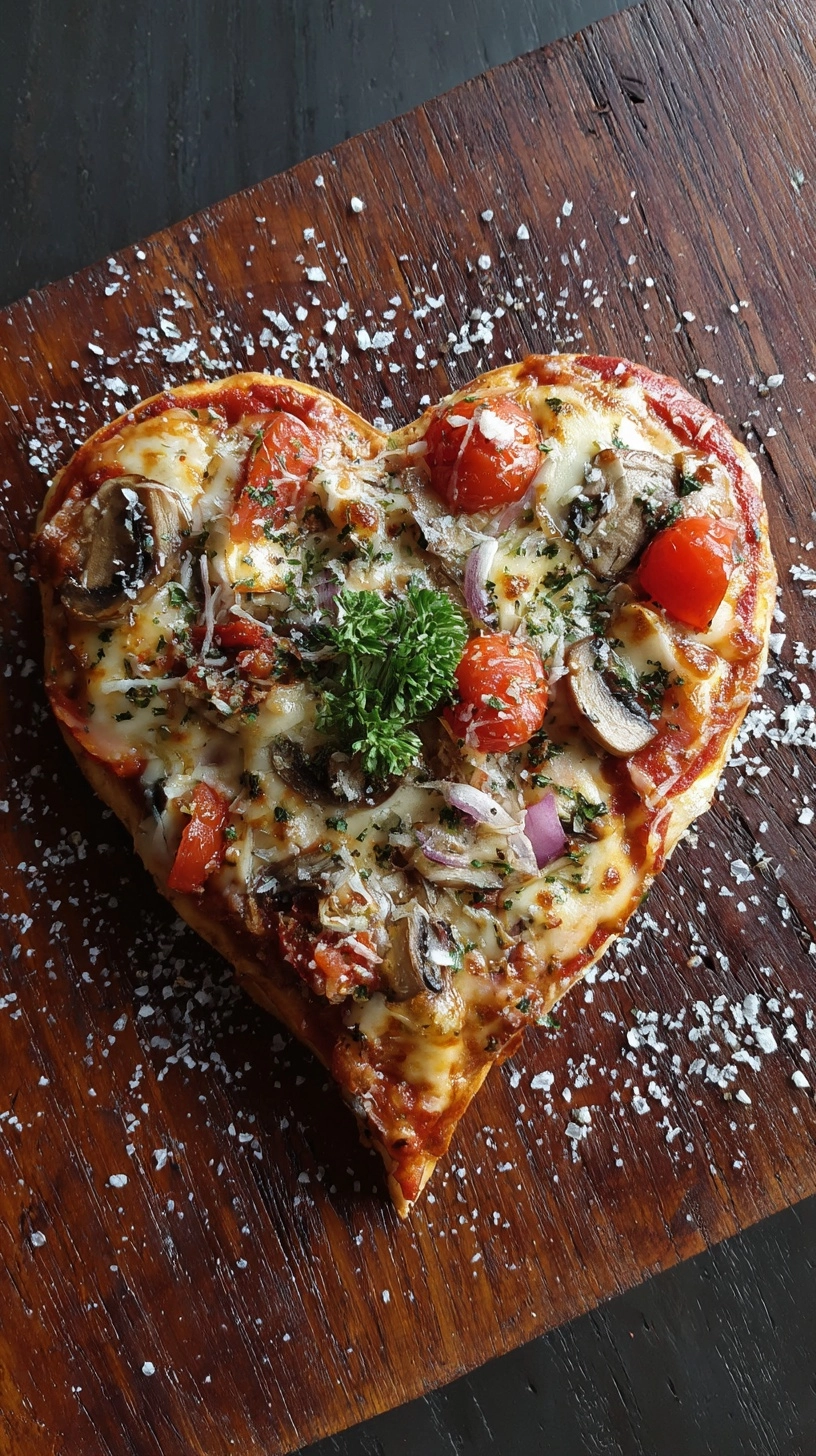
Step 4: Shape Your Heart with Professional Technique
Roll the risen dough into a circle approximately 12 inches in diameter. Here’s the secret technique: imagine the circle as a clock face, then create an indentation at the “12 o’clock” position using your knuckle. Gently pull the dough at “4 o’clock” and “8 o’clock” positions to form the heart’s lower curves, then pinch the bottom into a point. This method creates a more symmetrical heart than cutting techniques.
Step 5: Build Layers of Flavor
Spread sauce evenly, leaving a ½-inch border for the crust. Distribute mozzarella pieces strategically, ensuring coverage while avoiding overloading, which can make the heart shape sag. Sprinkle Parmesan and any additional toppings, keeping the heart’s outline visible for maximum visual impact.
Step 6: Achieve Golden Perfection
Bake at 475°F for 12-15 minutes until the crust is golden brown and cheese is bubbly with slight charring spots. The high temperature creates the perfect contrast between crispy edges and tender center that makes homemade pizza superior to delivery options.
Nutritional Information
Each serving of this heart shaped pizza (assuming 4 servings) contains approximately 385 calories, with 18g protein, 45g carbohydrates, and 15g fat. The homemade approach reduces sodium by a significant portion of compared to restaurant versions while providing nearly some of your daily calcium needs from the cheese combination. Fresh mozzarella contributes high-quality protein and essential amino acids, while the tomato sauce delivers lycopene—an antioxidant that increases bioavailability when cooked.
Healthier Alternatives for the Recipe
Transform this indulgent treat into a nutritional powerhouse by substituting whole wheat flour for half the all-purpose flour, adding fiber and B vitamins while maintaining texture. Cauliflower pizza crust reduces carbohydrates by more than half of and adds vegetables to your meal. Replace traditional cheese with part-skim mozzarella and add ricotta cheese mixed with spinach for extra protein and iron. Consider using sugar-free marinara sauce to reduce added sugars, or create a white sauce base using Greek yogurt mixed with herbs for probiotics and additional protein.
Serving Suggestions
Present your heart shaped pizza on a rustic wooden board surrounded by fresh arugula drizzled with balsamic glaze for an elegant contrast. Cut into wedges starting from the heart’s center, ensuring each piece maintains some of the characteristic shape. Pair with a mixed greens salad featuring strawberries and goat cheese to complement the romantic theme. For family dinners, create a pizza bar setup where everyone can add their favorite toppings before baking, making the experience interactive and memorable.
Common Mistakes to Avoid
Over-flouring the surface during shaping creates tough, dry crusts—use minimal flour and rely on gentle stretching techniques instead. Rushing the rising process results in dense, heavy pizza that won’t hold its heart shape properly. Overloading with toppings causes the dough to become soggy and lose its defined edges. Skipping the preheat time leads to uneven cooking and pale crusts. Finally, cutting immediately after baking causes cheese to slide off—allow 3-5 minutes cooling time for the perfect slice.
Storing Tips for the Recipe
Refrigerate leftover pizza wrapped in aluminum foil for up to 3 days, or freeze individual slices between parchment paper for up to 2 months. Reheat in a skillet over medium heat for 2-3 minutes to restore bottom crispiness, then cover for 1 minute to melt cheese. Prepare dough in advance by refrigerating after the first rise for up to 24 hours—cold fermentation actually improves flavor complexity. Par-bake crusts can be frozen for up to 3 months, allowing you to create fresh heart shaped pizzas in just 10 minutes.

FAQs
Can I make heart shaped pizza without a pizza stone? Absolutely! Use an inverted baking sheet preheated in the oven for similar results, or bake directly on a regular baking sheet lined with parchment paper.
How do I prevent the heart shape from distorting during baking? Ensure your dough isn’t over-proofed and avoid excessive toppings that add weight. A slightly thicker border around the heart’s edges helps maintain the shape.
What’s the best way to get crispy crust on the bottom? Preheat your baking surface for at least 30 minutes at maximum temperature, and consider brushing the bottom with olive oil before adding toppings.
Can I prepare the shaped dough ahead of time? Yes, shape the heart and refrigerate covered for up to 4 hours. Let it come to room temperature for 15 minutes before adding toppings and baking.
How do I make this recipe work for gluten-free diets? Use a 1:1 gluten-free flour blend and add 1 teaspoon xanthan gum if not included in your flour mixture. The dough may be slightly more delicate but will still hold its heart shape beautifully.
Kitchen Mosaic Notes
Thanks for reading! Remember that nutritional values are approximate. For the best results, adapt this recipe to your specific dietary needs.