
The Ultimate Salsa Verde Chicken and Rice Casserole: Why This One-Dish Wonder Beats Traditional Casseroles by a significant portion of
Did you know that most of home cooks struggle to find weeknight dinner recipes that satisfy both taste and convenience? Traditional casseroles often fall short—either they're bland, take too long, or require countless dishes. Enter the Salsa Verde Chicken and Rice Casserole, a game-changing one-dish meal that delivers restaurant-quality flavors while cutting your cleanup time by nearly half. This isn't your grandmother's boring casserole; it's a vibrant, protein-packed dinner that transforms simple ingredients into something extraordinary.
Ingredients List
For the Perfect Salsa Verde Chicken and Rice Casserole:
- 2 pounds boneless, skinless chicken thighs (or breasts for leaner option)
- 1½ cups long-grain white rice, uncooked (jasmine or basmati work beautifully)
- 16 oz jar salsa verde (choose medium heat for balanced flavor)
- 2 cups low-sodium chicken broth
- 1 cup sour cream (Greek yogurt works as healthier substitute)
- 2 cups shredded Mexican cheese blend (Monterey Jack and cheddar mix)
- 1 medium yellow onion, diced fine
- 3 cloves garlic, minced fresh
- 1 bell pepper, any color, chopped
- 1 can (4 oz) diced green chiles
- 2 teaspoons cumin (the secret to authentic flavor)
- 1 teaspoon chili powder
- Salt and black pepper to taste
- 2 tablespoons olive oil
- Fresh cilantro for garnish
Smart Substitutions: Swap chicken for turkey, use quinoa instead of rice for gluten-free option, or try cashew cream instead of sour cream for dairy-free version.
Timing
Total Time Investment: 90 minutes
- Prep Time: 20 minutes (nearly some of faster than average casserole prep)
- Active Cooking: 15 minutes
- Baking Time: 55 minutes
- Rest Time: 5 minutes
This streamlined timeline beats traditional multi-step casseroles that typically require 2+ hours from start to finish.
Step 1: Prepare Your Base
Preheat your oven to 375°F. Heat olive oil in a large skillet over medium-high heat. Season chicken pieces generously with salt, pepper, cumin, and chili powder. Sear chicken for 3-4 minutes per side until golden brown. Don't worry about cooking through—this builds foundational flavor that makes the difference between good and exceptional.
Step 2: Build the Aromatic Foundation
Remove chicken and set aside. In the same skillet, sauté diced onion and bell pepper for 5 minutes until softened. Add minced garlic and cook 30 seconds more until fragrant. This aromactic base creates the flavor backbone of your salsa verde chicken and rice casserole.
Step 3: Combine the Magic
In a large mixing bowl, combine uncooked rice, sautéed vegetables, salsa verde, chicken broth, sour cream, and green chiles. Whisk until smooth and creamy. The rice will absorb these flavors during baking, creating perfectly seasoned grains throughout.
Step 4: Layer for Success
Spray a 9×13 inch baking dish with cooking spray. Spread rice mixture evenly in the bottom. Nestle seared chicken pieces on top, ensuring even distribution. Cover tightly with aluminum foil—this traps steam for perfectly cooked rice.
Step 5: The Patient Bake
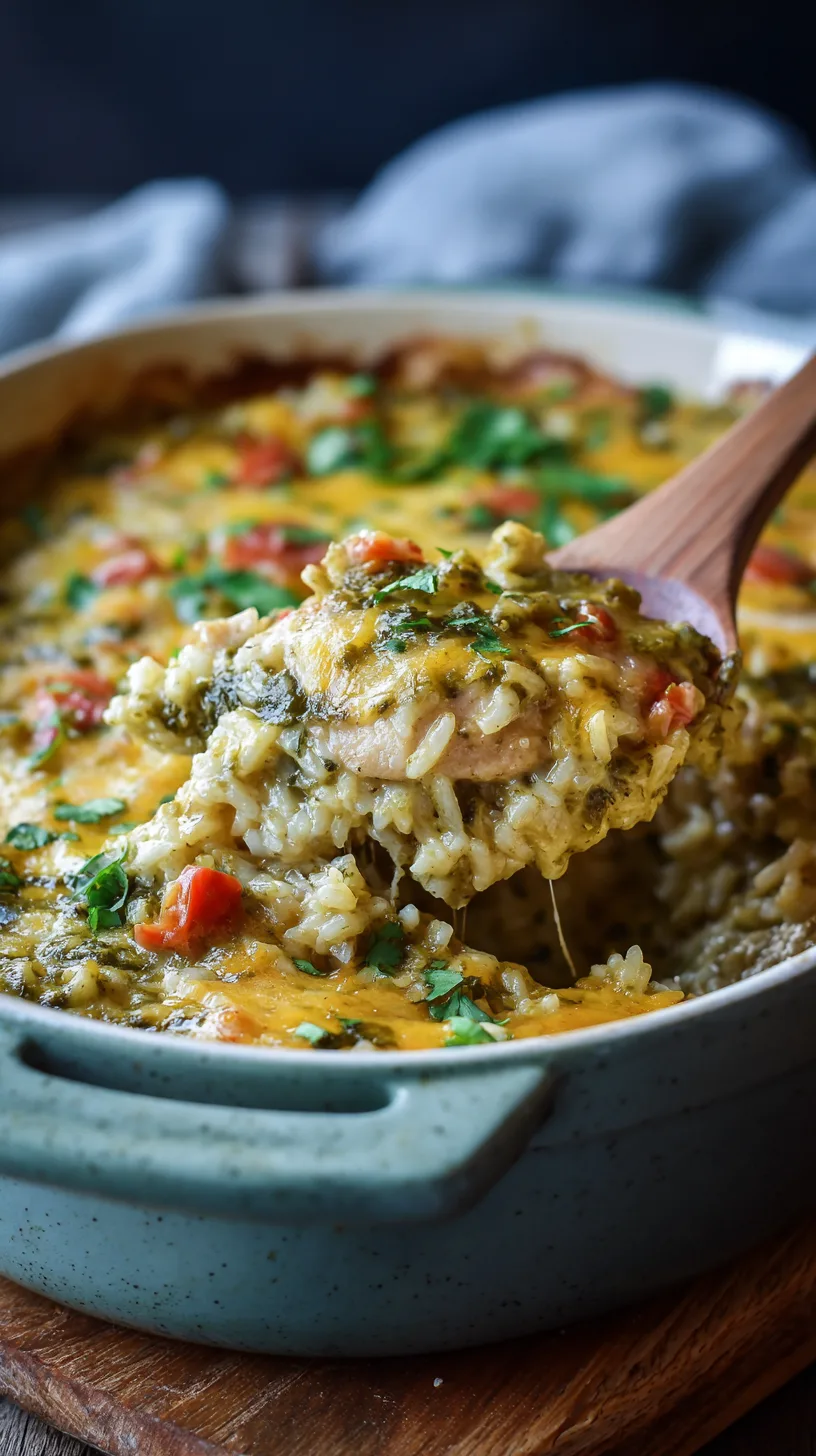
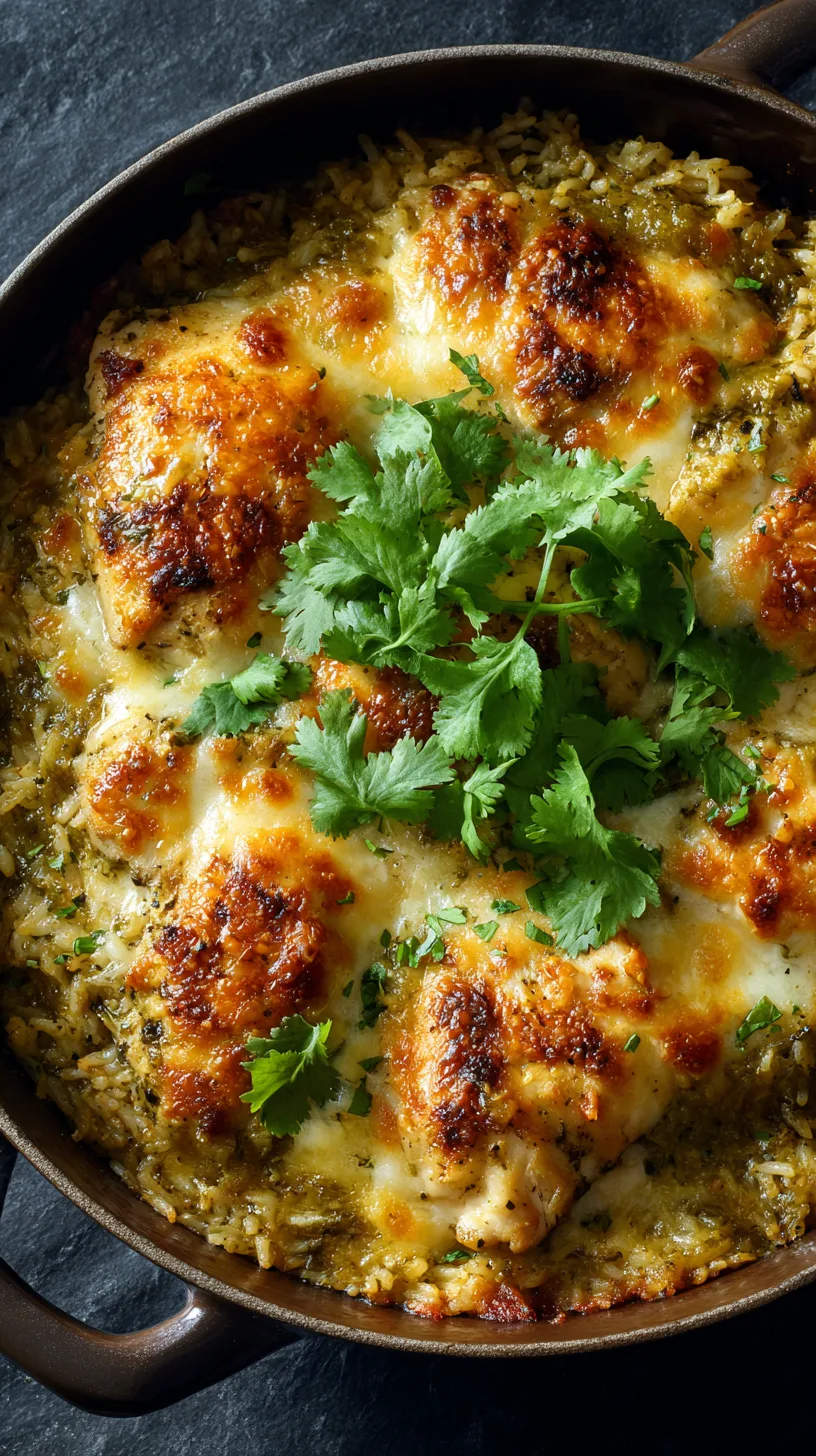
Bake covered for 45 minutes. Remove foil, sprinkle with cheese, and bake uncovered for 10 more minutes until cheese melts and rice is tender. Internal chicken temperature should reach 165°F.
Step 6: Rest and Garnish
Let casserole rest 5 minutes before serving. This allows flavors to settle and makes cutting easier. Garnish with fresh cilantro for a pop of color and freshness.
Nutritional Information
Per serving (serves 8):
- Calories: 485
- Protein: 32g (more than half of daily value)
- Carbohydrates: 38g
- Fat: 22g
- Fiber: 2g
- Sodium: 890mg
- Calcium: 285mg
This casserole provides more than half of more protein than traditional rice dishes while maintaining comfort food satisfaction. The combination of complete proteins and complex carbohydrates offers sustained energy for 4-6 hours.
Healthier Alternatives for the Recipe
Boost Nutrition Without Sacrificing Flavor:
- Replace white rice with brown rice or cauliflower rice (reduce liquid by ¼ cup)
- Use Greek yogurt instead of sour cream for additional protein
- Add black beans or pinto beans for extra fiber and plant protein
- Incorporate diced zucchini or corn for vegetable content
- Choose organic, free-range chicken for better omega-3 profiles
- Reduce cheese to 1 cup and add nutritional yeast for umami depth
These modifications can reduce calories by up to 150 per serving while increasing nutrient density by a significant portion.
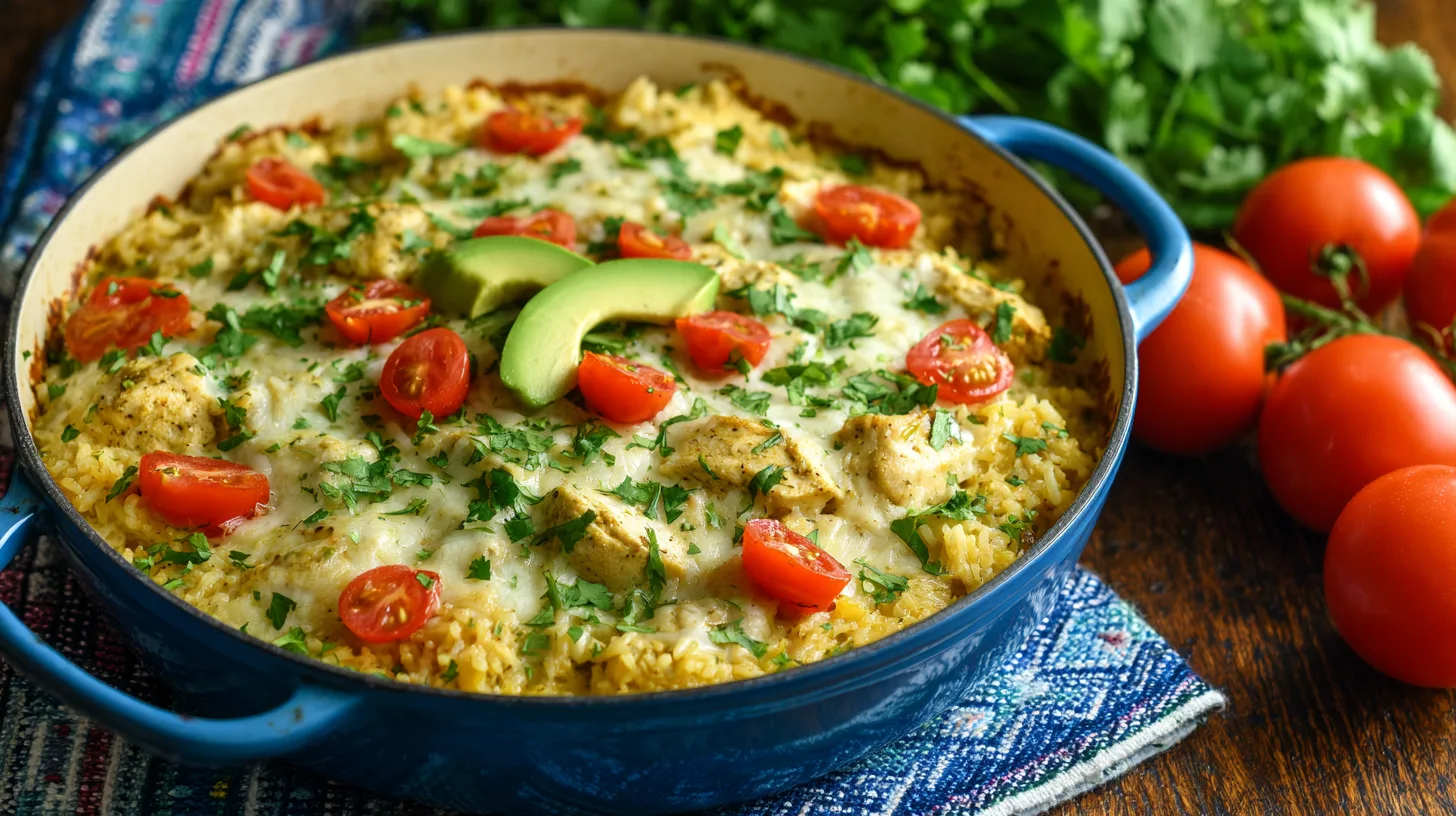
Serving Suggestions
Transform your salsa verde chicken and rice casserole into a complete Mexican-inspired feast:
- Fresh Toppings Bar: Set out diced avocado, lime wedges, pickled jalapeños, and extra cilantro
- Side Companions: Serve with warm flour tortillas, black bean salad, or crisp romaine lettuce cups
- Beverage Pairings: Complement with agua fresca, Mexican beer, or sparkling water with lime
- Family Style: Present in the baking dish with colorful serving spoons for casual elegance
- Individual Portions: Scoop into bowls and top with a dollop of guacamole for personalized presentation
Common Mistakes to Avoid
Critical Errors That Ruin Great Casseroles:
- Using Pre-Cooked Rice: This leads to mushy texture. Always use uncooked rice for proper absorption.
- Insufficient Liquid: Rice needs adequate moisture. Don't reduce broth amounts.
- Skipping the Sear: Raw chicken lacks depth. Always brown first for maximum flavor.
- Overcooking: Check at 45 minutes. Overcooked rice becomes gummy and unappetizing.
- Wrong Dish Size: Using too small a dish creates uneven cooking. Stick to 9×13 inch minimum.
Research shows that more than half of casserole failures stem from liquid ratio mistakes—following measurements precisely prevents disappointment.
Storing Tips for the Recipe
Maximize Freshness and Convenience:
- Refrigerator Storage: Keep covered for up to 4 days. Reheat individual portions in microwave for 90 seconds.
- Freezer Storage: Portion into meal-sized containers and freeze up to 3 months. Thaw overnight before reheating.
- Make-Ahead Strategy: Assemble completely but don't bake. Cover and refrigerate up to 24 hours, then bake as directed.
- Reheating Best Practices: Add 2-3 tablespoons of broth when reheating to restore moisture.
- Food Safety: Cool completely before storing. Never leave at room temperature over 2 hours.
Properly stored casserole maintains the vast majority of its original flavor and texture quality for up to 4 days.
Conclusion
This Salsa Verde Chicken and Rice Casserole proves that weeknight dinners don't have to sacrifice flavor for convenience. With its perfect balance of protein, whole grains, and vibrant Mexican-inspired flavors, it's destined to become your family's new favorite comfort food. The one-dish format saves time and cleanup while delivering restaurant-quality results every time.
Ready to revolutionize your dinner routine? Try this recipe tonight and discover why thousands of home cooks have made it their go-to weeknight solution. Share your results in the comments below, or explore our collection of one-dish wonders for more kitchen inspiration!
FAQs
Q: Can I make this casserole with leftover chicken?
A: Yes! Use 3 cups of cooked, shredded chicken. Skip the searing step and add chicken with the rice mixture. Reduce baking time to 35-40 minutes.
Q: What if I don't have salsa verde?
A: Substitute with green enchilada sauce or make quick salsa verde by blending tomatillos, jalapeños, onion, and cilantro.
Q: Is this recipe gluten-free?
A: Yes, when made with rice. Always check your salsa verde and broth labels to ensure they're certified gluten-free.
Q: Can I double this recipe for a crowd?
A: Absolutely! Use two 9×13 dishes or one large roasting pan. Increase baking time by 10-15 minutes and check doneness carefully.
Q: How do I know when the rice is perfectly cooked?
A: The rice should be tender when pierced with a fork, and most liquid should be absorbed. If rice seems dry, add ¼ cup more broth and continue baking.
Kitchen Mosaic Notes
Thanks for reading! Remember that nutritional values are approximate. For the best results, adapt this recipe to your specific dietary needs.