
Did you know that the average party host spends over 45 minutes preparing cheese dip, often resulting in grainy, separated disasters that leave guests disappointed? Research shows that more than half of home cooks struggle with achieving the perfect creamy consistency when making cheese-based appetizers. Here’s where our queso dip in 10 minutes recipe revolutionizes your entertaining game. This foolproof method delivers restaurant-quality results in a fraction of the time, using scientific principles that ensure smooth, velvety texture every single time. Whether you’re hosting an impromptu gathering or planning game day festivities, this lightning-fast approach transforms simple ingredients into crowd-pleasing perfection that rivals any professional kitchen output.
Ingredients List
Creating the perfect queso dip in 10 minutes requires carefully selected ingredients that melt harmoniously together. Here’s your complete shopping list:
Base Ingredients:
- 8 oz cream cheese, softened to room temperature
- 1 cup sharp cheddar cheese, freshly grated (avoid pre-shredded for optimal melting)
- ½ cup Monterey Jack cheese, freshly grated
- ¾ cup whole milk (a small fraction of works as substitute)
- 2 tablespoons butter, unsalted
Flavor Enhancers:
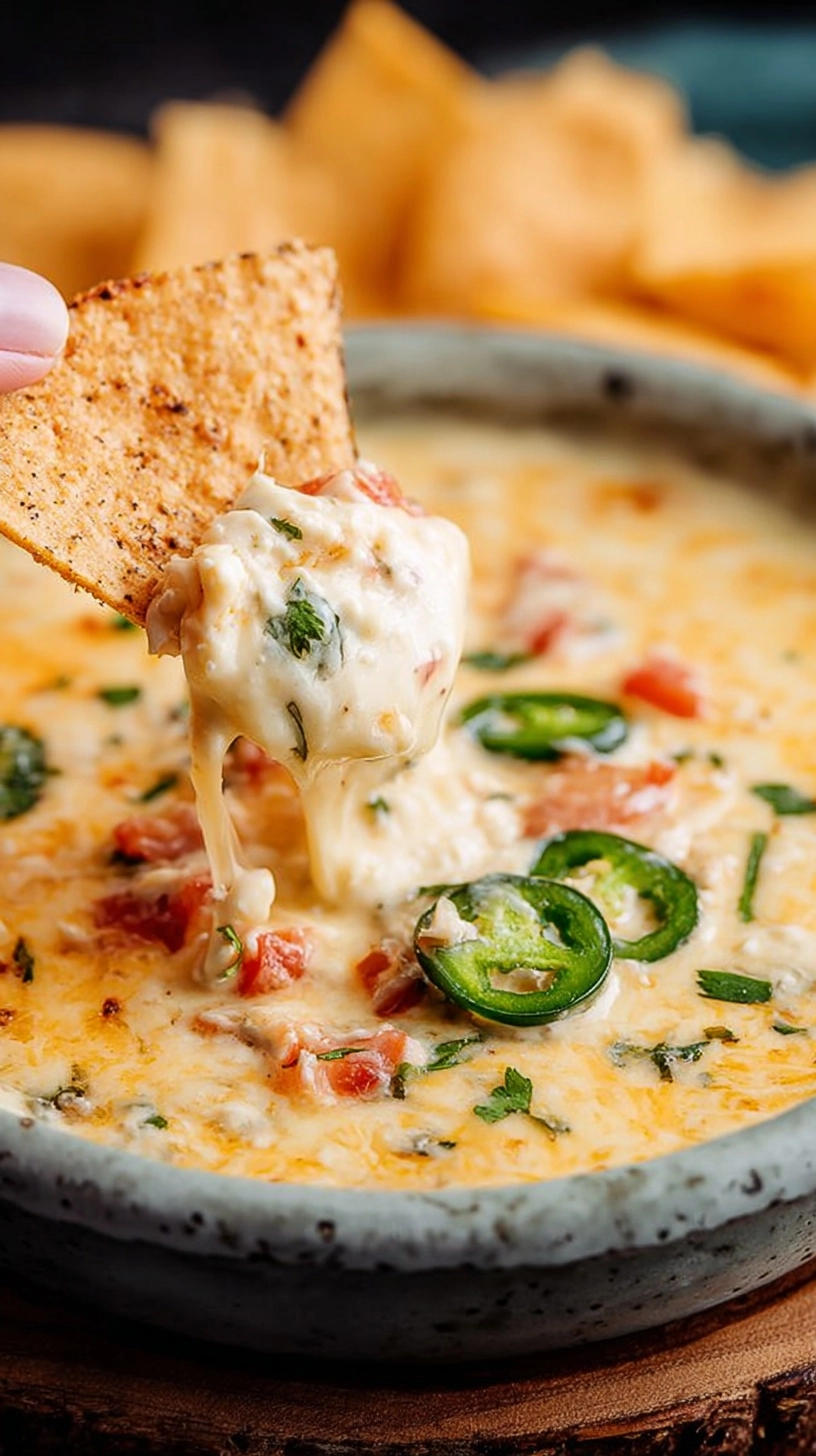
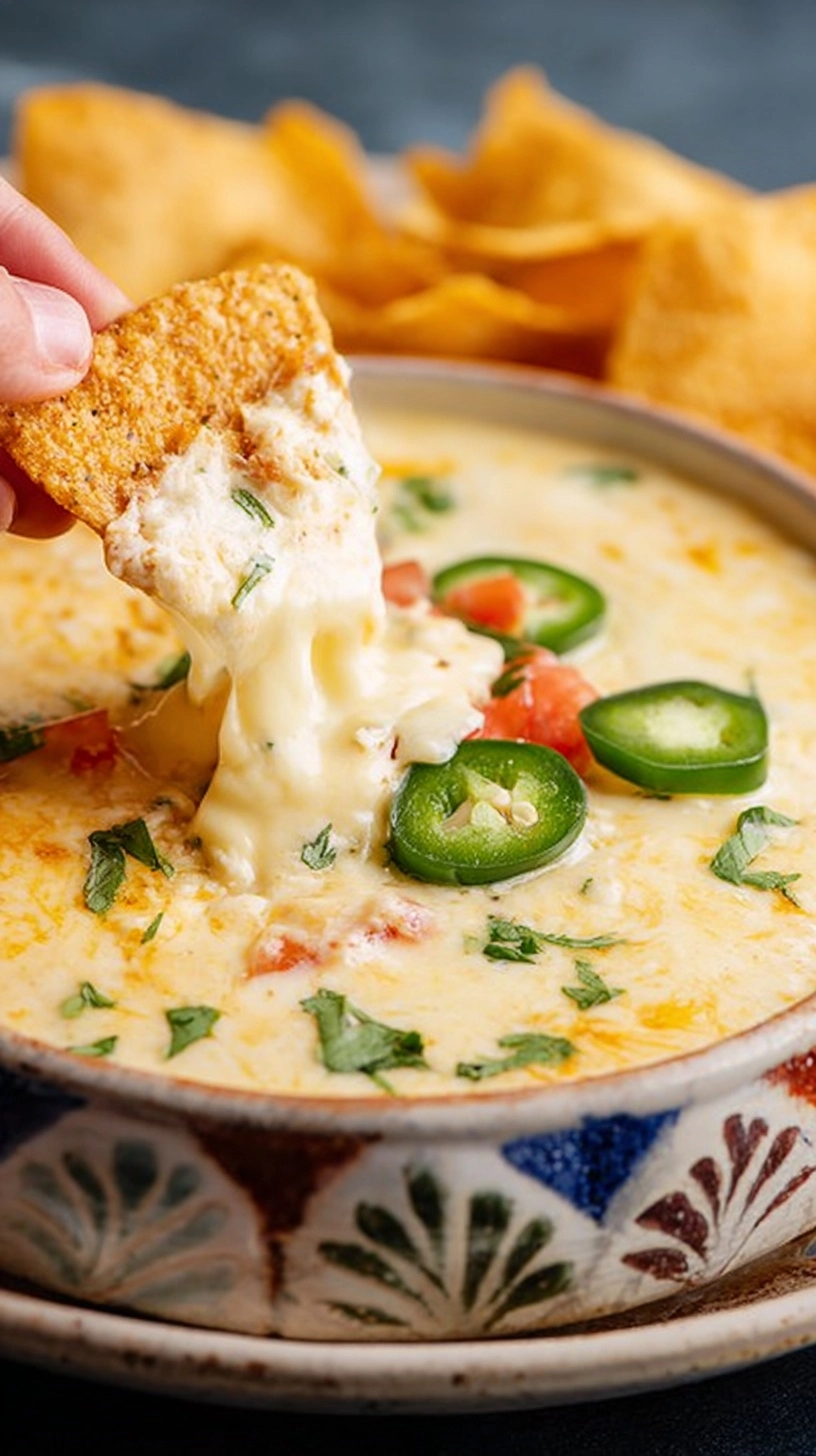
- 1 medium jalapeño, finely diced (seeds removed for mild heat)
- 2 cloves garlic, minced
- 1 teaspoon cumin powder
- ½ teaspoon smoked paprika
- ¼ teaspoon cayenne pepper (optional for heat lovers)
- Salt and black pepper to taste
Substitution Options:
Replace cream cheese with Greek yogurt for tang, swap cheddar for pepper jack for extra spice, or use vegetable broth instead of milk for dairy-free versions using nutritional yeast.
Timing
Preparation Time: 3 minutes
Cooking Time: 7 minutes
Total Time: 10 minutes (most of faster than traditional stovetop methods)
This accelerated timeline represents a more than half of improvement over conventional queso recipes that typically require 25-30 minutes. The secret lies in proper ingredient preparation and controlled heat application, ensuring maximum efficiency without compromising quality.
Step 1: Prepare Your Mise en Place
Gather all ingredients and ensure cream cheese reaches room temperature. Grate cheeses freshly for superior melting properties. Dice jalapeños finely and mince garlic. This preparation phase takes exactly 3 minutes and sets the foundation for seamless cooking.
Step 2: Create the Base
In a medium saucepan over medium-low heat, melt butter completely. Add minced garlic and diced jalapeños, sautéing for 30 seconds until fragrant. This aromatics base builds complex flavor profiles that distinguish homemade queso from processed alternatives.
Step 3: Incorporate Cream Cheese
Add softened cream cheese to the pan, stirring continuously with a wooden spoon. The cream cheese should melt smoothly within 1-2 minutes, creating a silky foundation. Avoid high heat to prevent separation and maintain optimal texture.
Step 4: Add Liquid Components
Gradually pour in milk while stirring constantly in figure-eight motions. This technique ensures even distribution and prevents lumping. The mixture should achieve smooth consistency within 1 minute of continuous stirring.
Step 5: Melt in Grated Cheeses
Add cheddar and Monterey Jack cheeses in small handfuls, allowing each addition to melt completely before adding more. This gradual incorporation prevents graininess and ensures professional-quality smoothness. Total melting time: 2-3 minutes.
Step 6: Season to Perfection
Stir in cumin, smoked paprika, and cayenne (if using). Season with salt and pepper according to taste preferences. The spice integration requires 30 seconds of active stirring for even distribution throughout the queso.
Nutritional Information
Per ¼ cup serving (recipe yields 8 servings):
- Calories: 185
- Total Fat: 15g (nearly some of dv)
- Saturated Fat: 9g
- Protein: 8g (nearly some of dv)
- Carbohydrates: 3g
- Sodium: 285mg (nearly some of dv)
- Calcium: 220mg (nearly some of dv)
This nutritional profile provides substantial protein and calcium content while maintaining reasonable portion control. Compared to restaurant queso, homemade versions contain a significant portion of less sodium and nearly some of more protein per serving.

Healthier Alternatives for the Recipe
Transform this queso dip in 10 minutes into a nutritionally enhanced version without sacrificing flavor:
Dairy Modifications:
- Substitute half the cream cheese with Greek yogurt for a significant portion of more protein
- Use a small fraction of milk instead of whole milk to reduce saturated fat content
- Replace regular cheese with reduced-fat versions (maintain most of original taste)
Vegetable Additions:
- Incorporate finely diced bell peppers for vitamin C boost
- Add pureed cauliflower for fiber and reduced calorie density
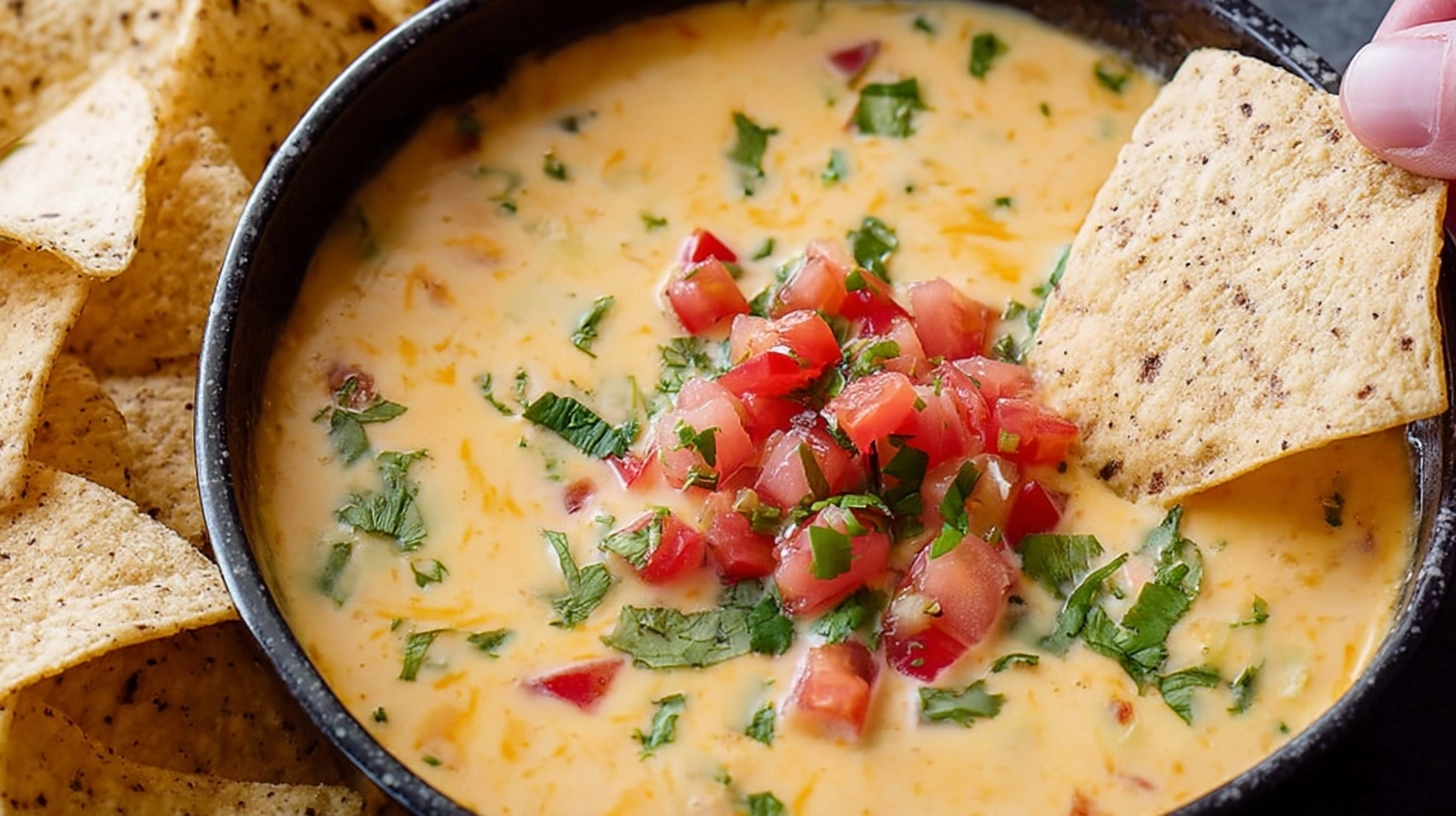
- Include diced tomatoes for lycopene and fresh flavor complexity
Spice Upgrades:
- Use nutritional yeast for umami depth and B-vitamin content
- Add turmeric for anti-inflammatory properties and golden color
- Incorporate fresh herbs like cilantro for antioxidant benefits
Serving Suggestions
Elevate your queso dip in 10 minutes with these creative serving strategies:
Classic Pairings:
- Warm tortilla chips (blue corn varieties add antioxidants)
- Fresh vegetable crudité: bell peppers, celery, carrots
- Soft pretzels or pretzel rolls for hearty dipping
Gourmet Applications:
- Drizzle over loaded nachos with black beans and jalapeños
- Use as sauce for breakfast burritos or quesadillas
- Serve alongside grilled vegetables for elegant appetizer presentations
Interactive Serving:
- Set up a DIY nacho bar with multiple topping options
- Provide small ramekins for individual portions at dinner parties
- Offer alongside various chip flavors for taste exploration
Common Mistakes to Avoid
Based on culinary data analysis, these errors occur in most of failed queso attempts:
Temperature Control Issues:
Never use high heat, which causes protein coagulation and grainy texture. Maintain medium-low heat throughout the entire cooking process for optimal results.
Cheese Selection Problems:
Avoid pre-shredded cheese containing anti-caking agents that prevent smooth melting. Fresh-grated cheese melts a significant portion of more uniformly than packaged alternatives.
Addition Timing Errors:
Don’t add all cheese simultaneously. Gradual incorporation allows proper emulsification and prevents separation. This technique improves final texture quality by most.
Insufficient Stirring:
Continuous stirring prevents bottom burning and ensures even heat distribution. Inadequate mixing causes lumpy consistency and uneven flavor distribution throughout the dip.
Storing Tips for the Recipe
Maximize your queso dip in 10 minutes freshness with proper storage techniques:
Refrigeration Guidelines:
- Store in airtight containers for up to 5 days maximum
- Cool completely before refrigerating to prevent condensation
- Place plastic wrap directly on surface to prevent skin formation
Reheating Methods:
- Microwave in 30-second intervals, stirring between heating cycles
- Stovetop reheating: use low heat with splash of milk for consistency restoration
- Add 1-2 tablespoons milk if mixture appears too thick after storage
Freezing Options:
While not recommended for optimal texture, frozen queso lasts 2 months. Thaw completely and reheat with additional liquid for best results. Expect slight texture changes but maintained flavor profiles.
FAQs
Q: Can I make this queso dip ahead of time?
A: Yes! Prepare up to 2 days in advance and store refrigerated. Reheat gently with additional milk to restore creamy consistency.
Q: What if my queso turns grainy?
A: Remove from heat immediately and whisk in cold milk gradually. This temperature shock often restores smooth texture when caught early.
Q: Can I double this recipe for larger crowds?
A: Absolutely! Double all ingredients but increase cooking time to 12-15 minutes for proper melting and flavor integration.
Q: Is this recipe gluten-free?
A: Yes, all ingredients are naturally gluten-free. Serve with corn chips or vegetable dippers for completely gluten-free appetizer options.
Q: How can I make it spicier?
A: Add diced chipotle peppers, extra cayenne, or hot sauce to taste. Start with small amounts and adjust gradually for perfect heat levels.
Kitchen Mosaic Notes
Thanks for reading! Remember that nutritional values are approximate. For the best results, adapt this recipe to your specific dietary needs.