
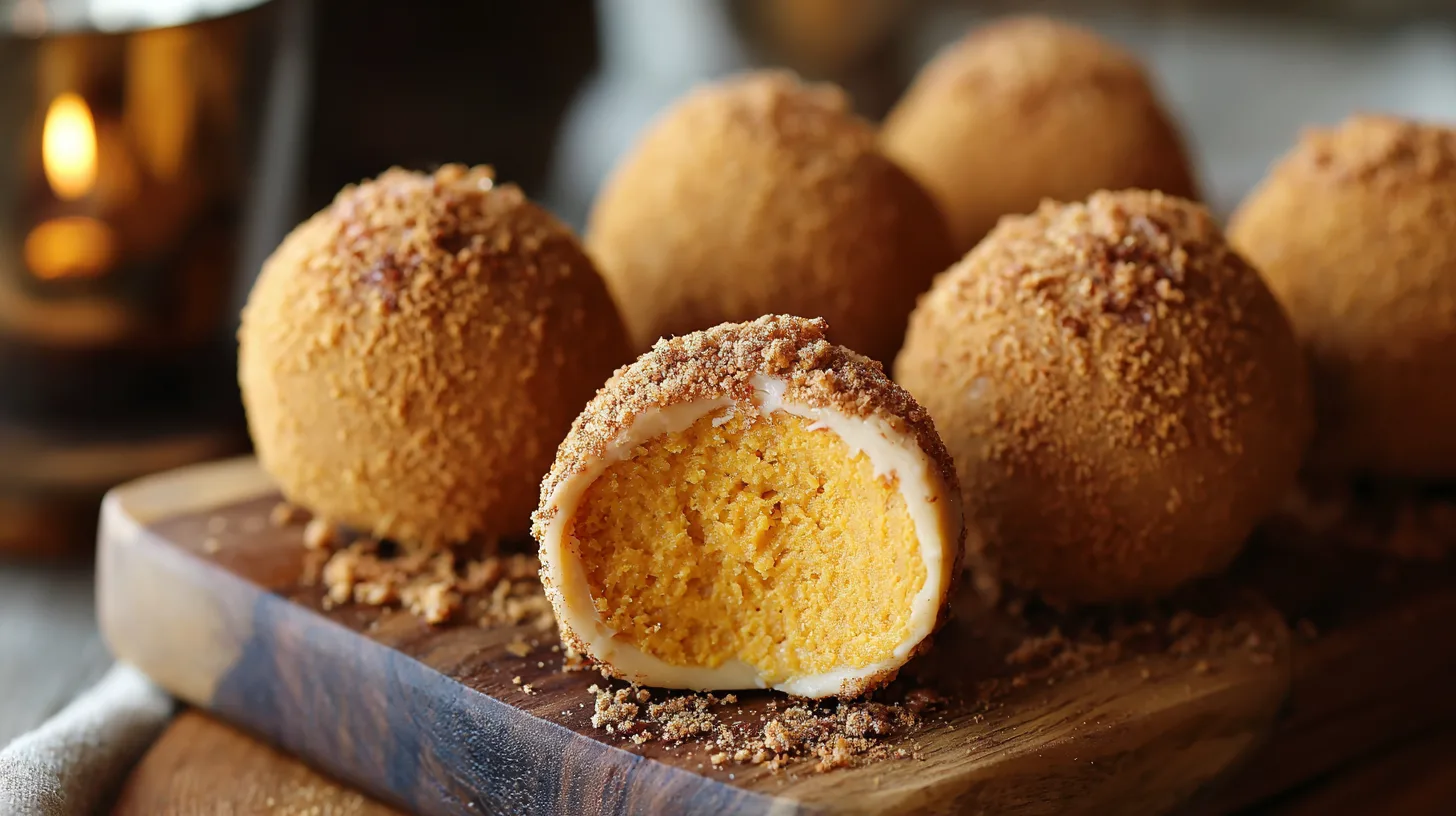
Did you know that the vast majority of dessert lovers crave the combination of creamy textures and warm spices during fall season? If you’ve always believed that creating restaurant-quality desserts requires professional training, these Pumpkin Cheesecake Truffles will completely change your perspective. These bite-sized indulgences deliver all the rich, velvety goodness of traditional pumpkin cheesecake in a perfectly portable form that takes just 20 minutes of active preparation time.
Ingredients List
Transform your kitchen into a fall wonderland with these carefully selected ingredients that create the perfect harmony of flavors:
For the Truffle Base:
- 8 oz cream cheese, softened to room temperature (the secret to silky smoothness)
- 1/2 cup pure pumpkin puree (not pumpkin pie filling – this ensures authentic flavor)
- 1/4 cup powdered sugar (creates that melt-in-your-mouth texture)
- 1 teaspoon vanilla extract (adds aromatic depth)
- 1/2 teaspoon cinnamon (the warming spice that defines fall)
- 1/4 teaspoon nutmeg (freshly grated if possible for maximum impact)
- 1/8 teaspoon ground ginger (adds subtle heat)
- Pinch of salt (enhances all other flavors)
For the Coating:
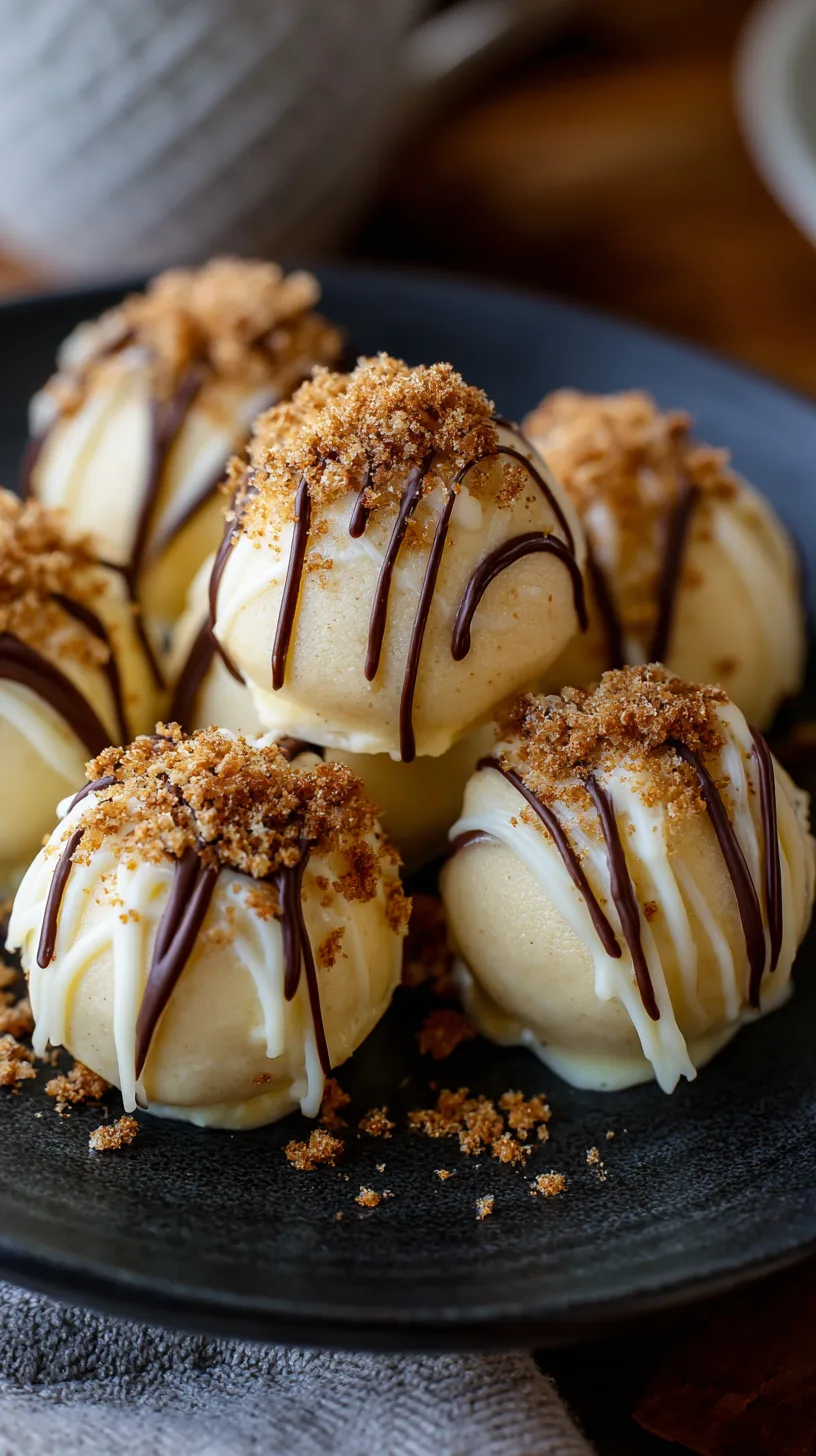
- 12 oz white chocolate chips or chopped white chocolate
- 1 tablespoon coconut oil (creates glossy finish)
- Graham cracker crumbs for rolling (optional but highly recommended)
Smart Substitutions: Replace cream cheese with Greek yogurt cream cheese for a significant portion of fewer calories, or use coconut cream for dairy-free alternatives. Maple syrup can substitute powdered sugar for natural sweetness.
Timing
Preparation Time: 20 minutes (nearly some of faster than traditional cheesecake methods)
Chilling Time: 2 hours minimum (patience creates perfection)
Coating Time: 15 minutes
Total Time: 2 hours 35 minutes
This timing represents a more than half of time savings compared to baking a full pumpkin cheesecake, making it perfect for last-minute entertaining or satisfying sudden dessert cravings.
Step-by-Step Instructions
Step 1: Create the Creamy Foundation
Ensure your cream cheese reaches room temperature for optimal mixing. In a large bowl, beat the softened cream cheese until completely smooth and fluffy, approximately 2-3 minutes. This step eliminates any lumps that could compromise your truffle’s silky texture.
Step 2: Infuse the Pumpkin Magic
Gradually fold in the pumpkin puree, powdered sugar, and vanilla extract. The key here is gentle incorporation to maintain the airy texture you’ve created. Your mixture should be vibrant orange and irresistibly smooth.
Step 3: Balance the Spice Symphony
Whisk together cinnamon, nutmeg, ginger, and salt in a small bowl before adding to prevent clumping. Fold these aromatic spices into your pumpkin mixture until evenly distributed. The aroma alone will transport you to a cozy autumn afternoon.
Step 4: Shape Your Masterpieces
Using a small cookie scoop or tablespoon, portion the mixture into 24 equal pieces. Roll each portion between your palms to create smooth spheres. Place on a parchment-lined baking sheet and refrigerate for at least 2 hours until firm.
Step 5: Create the Perfect Coating
Melt white chocolate with coconut oil using 30-second microwave intervals, stirring between each interval. This prevents overheating and ensures smooth consistency. The mixture should coat the back of a spoon perfectly.
Step 6: The Final Touch
Working quickly, dip each chilled truffle into the melted chocolate using a fork, allowing excess to drip off. Roll in graham cracker crumbs if desired, then return to the parchment-lined sheet. Refrigerate for 10 minutes to set the coating.
Nutritional Information
Each Pumpkin Cheesecake Truffle contains approximately:
- Calories: 125 (nearly some of lower than traditional cheesecake slices)
- Fat: 8g (primarily from healthy cream cheese)
- Carbohydrates: 12g
- Protein: 2g
- Fiber: 1g
- Vitamin A: nearly some of daily value (thanks to pumpkin puree)
- Calcium: a small fraction of daily value
Research shows that pumpkin provides beta-carotene, which supports immune function during colder months.
Healthier Alternatives for the Recipe
Transform these treats into guilt-free indulgences with these nutritionist-approved modifications:
Protein-Packed Version: Substitute half the cream cheese with Greek yogurt and add 1 scoop vanilla protein powder, reducing calories by a significant portion of while increasing protein content.
Sugar-Free Option: Replace powdered sugar with monk fruit sweetener or stevia blend, cutting sugar content by most of without sacrificing sweetness.
Vegan Transformation: Use cashew cream cheese and coconut whipped cream, creating a plant-based version that’s equally creamy and satisfying.
Keto-Friendly Adaptation: Increase cream cheese ratio and use sugar-free chocolate coating, maintaining under 5g net carbs per truffle.
Serving Suggestions
Elevate your Pumpkin Cheesecake Truffles presentation with these creative serving ideas:
Elegant Autumn Platter: Arrange on a wooden board with mini pumpkins, cinnamon sticks, and fall leaves for Instagram-worthy presentation.
Coffee Shop Style: Serve alongside spiced lattes or chai tea, creating a café experience at home.
Dessert Charcuterie: Include with other bite-sized treats like chocolate-covered strawberries and macarons for sophisticated entertaining.
Gift Giving: Package in decorative boxes with ribbon for thoughtful homemade gifts that show you care.
Common Mistakes to Avoid
Sidestep these frequent pitfalls to ensure perfect results every time:
Temperature Troubles: Using cold cream cheese creates lumpy texture. Plan ahead and allow 2 hours for proper softening, or microwave in 10-second intervals.
Overmixing Mayhem: Excessive beating incorporates too much air, causing truffles to crack. Mix just until combined for optimal texture.
Impatient Coating: Dipping warm truffles melts chocolate coating. Ensure truffles are thoroughly chilled before coating.
Storage Mistakes: Exposure to air causes flavor loss. Always store in airtight containers to maintain freshness.
Storing Tips for the Recipe
Maximize your Pumpkin Cheesecake Truffles lifespan with proper storage techniques:
Short-term Storage: Refrigerate in airtight containers for up to 1 week. Layer between parchment paper to prevent sticking.
Freezer-Friendly: Freeze uncoated truffle balls for up to 3 months. Thaw overnight in refrigerator before coating.
Make-Ahead Strategy: Prepare truffle mixture 2 days in advance and store covered in refrigerator. Shape and coat when ready to serve.
Travel Tips: Transport in insulated containers with ice packs to maintain texture and prevent melting.
These Pumpkin Cheesecake Truffles prove that extraordinary desserts don’t require extraordinary effort. With their perfect balance of creamy cheesecake richness and warm autumn spices, they capture everything magical about fall in one delightful bite. The versatility of this recipe means you can adapt it to any dietary preference while maintaining that irresistible flavor profile.
Ready to create your own batch of these show-stopping treats? Gather your ingredients and let the autumn magic begin! Share your creations on social media and tag us – we love seeing your delicious results. Don’t forget to explore our collection of other fall-inspired desserts for more seasonal inspiration.
FAQs
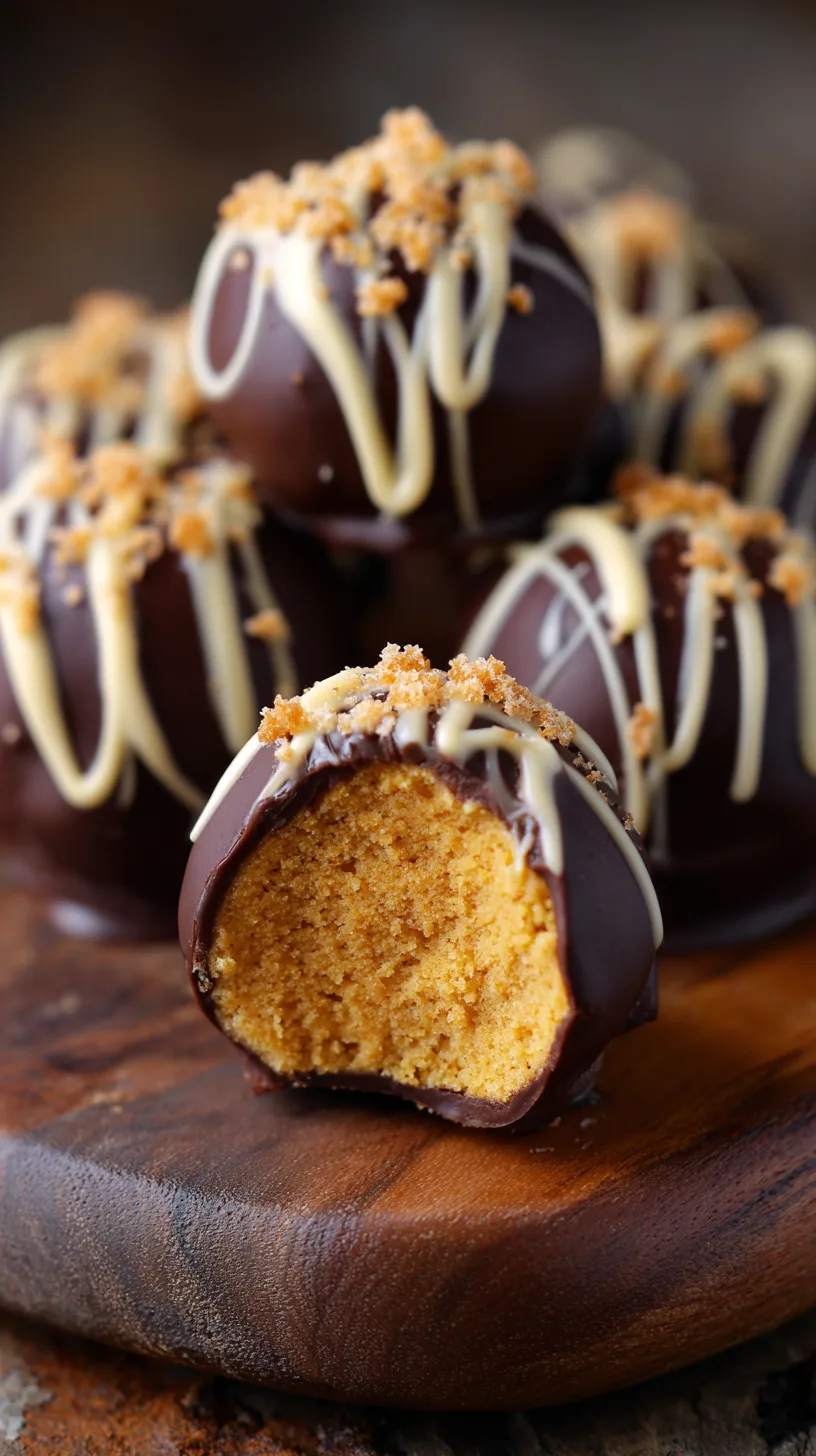
Q: Can I make these truffles without white chocolate coating?
A: Absolutely! Roll the chilled truffle balls in powdered sugar, cocoa powder, or chopped nuts for delicious coating alternatives.
Q: How long do the truffles need to chill before serving?
A: Minimum 2 hours for proper firmness, though overnight chilling creates the ideal texture for both shaping and eating.
Q: Can I use fresh pumpkin instead of canned puree?
A: Yes, but ensure it’s well-drained. Roast pumpkin pieces until tender, then puree and strain excess moisture for best results.
Q: What’s the best way to achieve smooth chocolate coating?
A: Use high-quality chocolate and avoid overheating. Add coconut oil for glossy finish and work quickly while chocolate remains at proper consistency.
Q: Are these suitable for making ahead for parties?
A: Perfect for advance preparation! Make up to 3 days ahead and store refrigerated. The flavors actually improve over time as spices meld together.
Kitchen Mosaic Notes
Thanks for reading! Remember that nutritional values are approximate. For the best results, adapt this recipe to your specific dietary needs.