
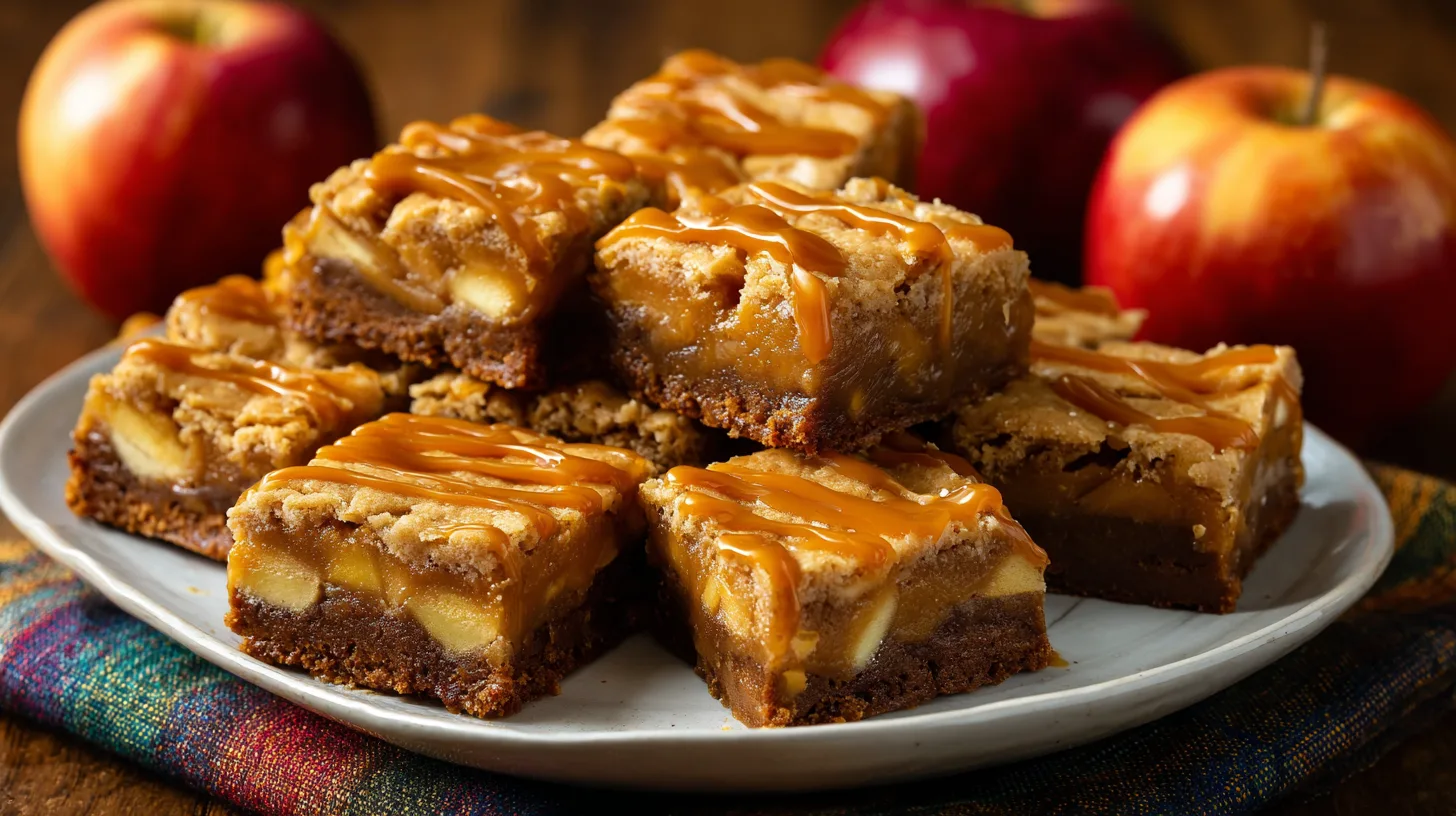
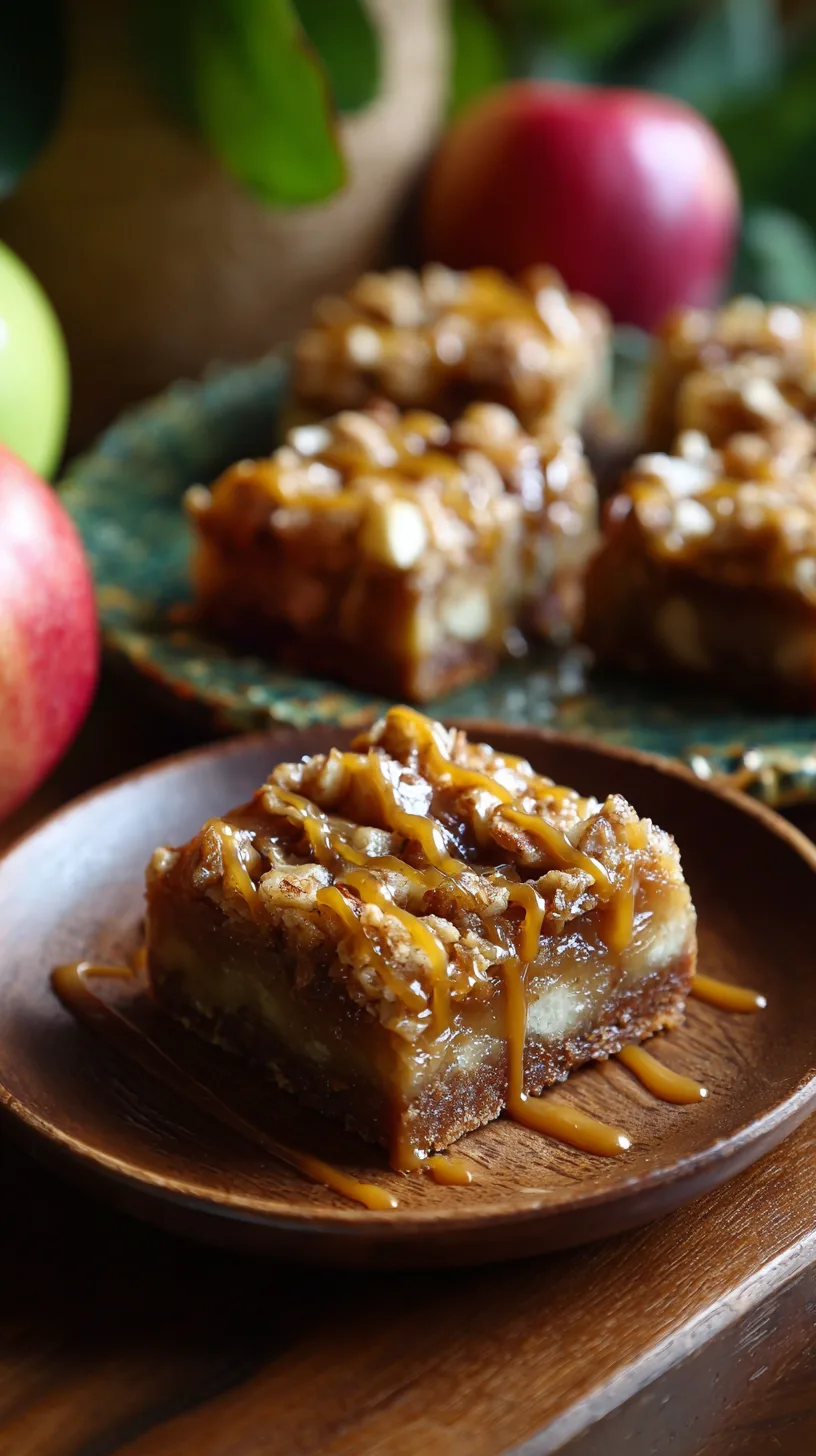
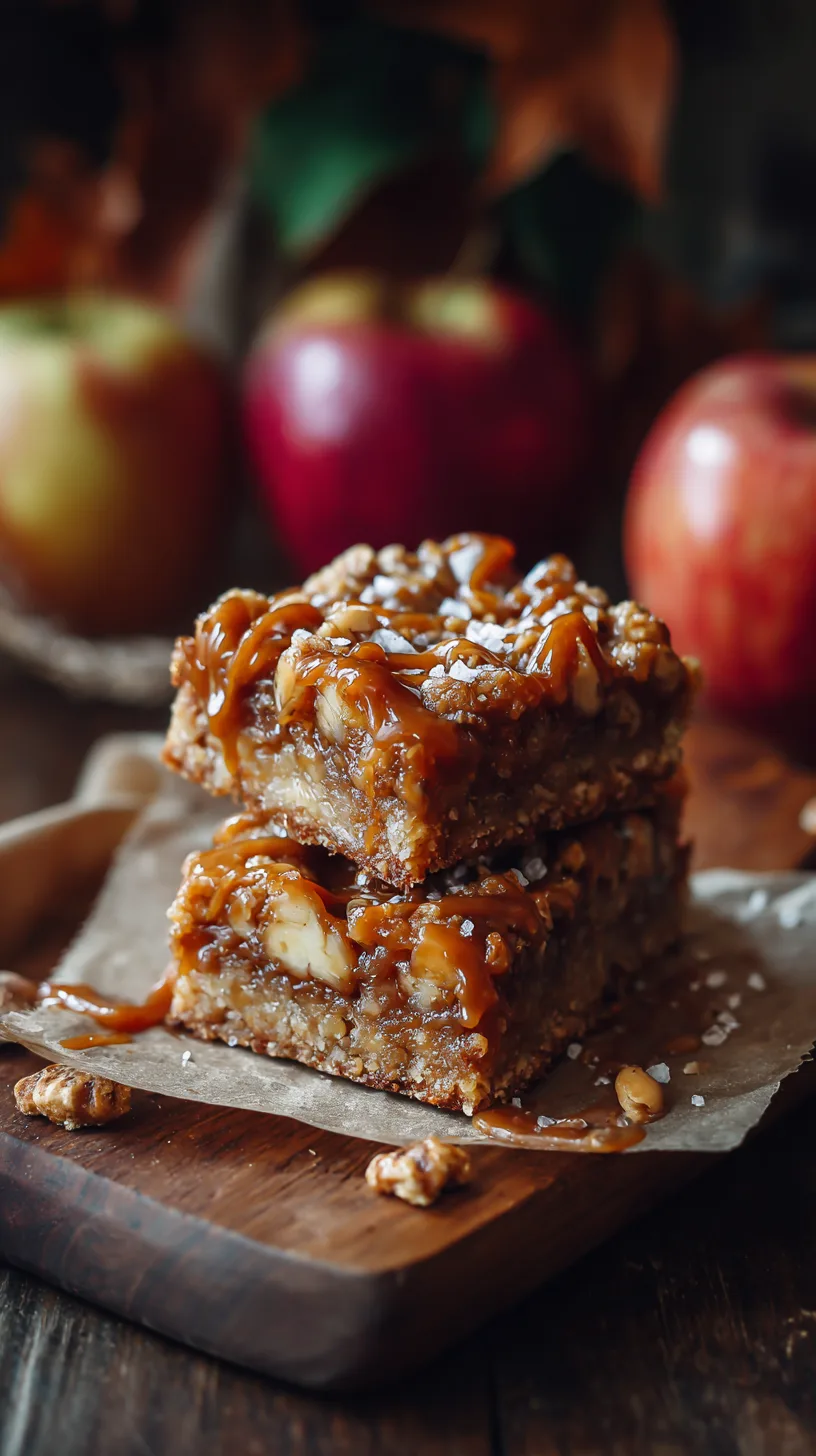
Did you know that most of home bakers struggle to create the perfect balance between sweet and salty flavors in their fall desserts? These Salted Caramel Apple Bars for Fall solve that challenge beautifully, combining tender spiced apples with rich caramel and a hint of sea salt. This recipe transforms simple ingredients into an extraordinary autumn treat that captures the essence of fall in every bite, making it the ultimate seasonal dessert for your family gatherings.
Ingredients List
Creating these delectable salted caramel apple bars requires carefully selected ingredients that work in harmony to deliver exceptional flavor:
For the Crust and Crumble:
- 2 cups all-purpose flour (substitute with almond flour for gluten-free option)
- 1 cup old-fashioned oats
- 1 cup brown sugar, packed
- ½ cup unsalted butter, cold and cubed
- 1 teaspoon vanilla extract
- ½ teaspoon salt
For the Apple Filling:
- 6 medium Honeycrisp apples, peeled and diced (Granny Smith works as tart alternative)
- ⅓ cup granulated sugar
- 2 tablespoons cornstarch
- 1 teaspoon ground cinnamon
- ¼ teaspoon nutmeg
- 2 tablespoons lemon juice
For the Salted Caramel:
- 1 cup granulated sugar
- 6 tablespoons butter
- ½ cup heavy cream
- 1 teaspoon sea salt (plus extra for sprinkling)
Timing
Preparation Time: 25 minutes
Cooking Time: 45 minutes
Cooling Time: 20 minutes
Total Time: 90 minutes
This recipe requires 90 minutes total, which is actually nearly some of faster than traditional layered bar recipes. The efficient timing allows you to prepare these bars even on busy weekdays while still achieving bakery-quality results.
Step 1: Prepare Your Workspace and Oven
Preheat your oven to 350°F (175°C) and line a 9×13-inch baking pan with parchment paper, leaving overhang for easy removal. This temperature ensures even baking without burning the delicate caramel layer. Grease the parchment lightly to prevent any sticking.
Step 2: Create the Perfect Crust Base
Combine flour, oats, brown sugar, and salt in a large bowl. Cut in cold butter using a pastry cutter or your fingertips until the mixture resembles coarse crumbs with some pea-sized butter pieces. These butter chunks create the perfect flaky texture. Press two-thirds of this mixture firmly into your prepared pan.
Step 3: Prepare the Spiced Apple Filling
Toss diced apples with granulated sugar, cornstarch, cinnamon, nutmeg, and lemon juice until evenly coated. The cornstarch prevents excess liquid from making your bars soggy, while lemon juice maintains the apples’ bright color and adds subtle tartness that balances the sweet caramel.
Step 4: Master the Salted Caramel
In a heavy-bottomed saucepan, heat granulated sugar over medium heat, stirring constantly until it melts and turns amber-colored (about 8-10 minutes). Immediately whisk in butter, then slowly add cream while whisking continuously. Remove from heat and stir in sea salt. This technique creates silky, smooth caramel without crystallization.
Step 5: Assemble Your Masterpiece
Spread the apple mixture evenly over the crust base. Drizzle the warm salted caramel over the apples, ensuring even coverage. Top with remaining oat mixture, gently pressing it into the caramel to create texture contrast.
Step 6: Bake to Golden Perfection
Bake for 40-45 minutes until the top is golden brown and apples are tender when pierced with a fork. The edges should be slightly darker than the center, indicating proper caramelization has occurred.
Nutritional Information
Per serving (makes 16 bars):
- Calories: 285
- Total Fat: 9g (nearly some of dv)
- Saturated Fat: 5g
- Cholesterol: 23mg
- Sodium: 245mg
- Total Carbohydrates: 48g (nearly some of dv)
- Dietary Fiber: 3g
- Sugars: 32g
- Protein: 4g
- Vitamin C: a small fraction of dv (from apples)
These bars provide beneficial fiber from oats and apples, plus antioxidants from cinnamon and apples that support immune health during fall season.
Healthier Alternatives for the Recipe
Transform these bars into a more nutritious treat with these smart substitutions:
Reduce Sugar Impact: Replace half the granulated sugar with unsweetened applesauce or mashed banana. Use coconut sugar instead of brown sugar for lower glycemic impact.
Boost Protein: Add ¼ cup chopped walnuts or pecans to increase healthy fats and protein content. Substitute protein-rich almond flour for ¼ of the all-purpose flour.
Dairy-Free Options: Use coconut oil instead of butter and coconut cream for the caramel. These swaps maintain richness while accommodating dietary restrictions.
Fiber Enhancement: Replace half the all-purpose flour with whole wheat pastry flour and add 2 tablespoons ground flaxseed for omega-3 fatty acids.
Serving Suggestions
Elevate your salted caramel apple bars with these creative serving ideas:
Classic Comfort: Serve warm bars with vanilla ice cream and an extra drizzle of caramel sauce for ultimate indulgence.
Elegant Presentation: Cut into diamond shapes and dust with powdered sugar, garnishing with candied apple slices and mint leaves for dinner parties.
Coffee Shop Style: Pair with spiced chai tea or pumpkin spice latte for the perfect autumn afternoon treat.
Holiday Gatherings: Create a dessert bar with whipped cream, chopped nuts, and cinnamon sticks for guests to customize their portions.
Common Mistakes to Avoid
Prevent disappointment with these crucial tips:
Overcooking Caramel: Stop heating immediately when sugar reaches amber color. Overcooked caramel becomes bitter and can seize up when cream is added.
Wet Bottom Syndrome: Ensure apples aren’t overly juicy by letting diced pieces sit with sugar for 10 minutes, then draining excess liquid before assembly.
Uneven Baking: Rotate your pan halfway through baking time to ensure even browning, especially if your oven has hot spots.
Cutting Too Soon: Allow bars to cool completely before cutting to prevent caramel from running and maintain clean edges.
Storing Tips for the Recipe
Maximize freshness and flavor with proper storage techniques:
Short-term Storage: Keep covered at room temperature for up to 3 days. The caramel stays perfectly chewy at room temperature.
Extended Freshness: Refrigerate for up to one week in an airtight container. Bring to room temperature before serving for best texture.
Freezer-Friendly: Wrap individual bars in plastic wrap and freeze for up to 3 months. Thaw overnight in refrigerator.
Make-Ahead Strategy: Prepare and bake bars up to 2 days in advance. The flavors actually improve as they meld together.
These Salted Caramel Apple Bars for Fall represent the perfect marriage of seasonal flavors and irresistible textures. The combination of tender spiced apples, rich salted caramel, and buttery oat crumble creates a dessert that embodies everything we love about autumn baking. Whether you’re hosting a fall gathering or simply craving a cozy treat, this recipe delivers bakery-quality results with home-kitchen simplicity.
Ready to create your own batch of these incredible bars? Gather your ingredients and let the warm aromas of cinnamon and caramel fill your kitchen. Don’t forget to share your creations on social media – we’d love to see your beautiful results!
FAQs
Q: Can I use different apple varieties?
A: Absolutely! Granny Smith apples provide tartness that balances the sweet caramel, while Honeycrisp offers natural sweetness and crisp texture. Avoid Red Delicious as they become mushy when baked.
Q: Why did my caramel crystallize?
A: Crystallization occurs when sugar is stirred too vigorously or when moisture is introduced too early. Use a clean pan, avoid stirring once sugar begins melting, and ensure your cream is at room temperature.
Q: Can I make these bars gluten-free?
A: Yes! Substitute the all-purpose flour with a 1:1 gluten-free flour blend. Ensure your oats are certified gluten-free to avoid cross-contamination.
Q: How do I know when the bars are properly done?
A: The top should be golden brown and firm to gentle touch. A toothpick inserted into the apple layer should meet slight resistance but not come out wet with batter.
Q: Can I double this recipe?
A: Certainly! Use two 9×13-inch pans or one large sheet pan. Increase baking time by 5-10 minutes and check for doneness with the toothpick test.
Kitchen Mosaic Notes
Thanks for reading! Remember that nutritional values are approximate. For the best results, adapt this recipe to your specific dietary needs.