
Did you know that Americans consume over 10 billion bowls of chili annually, yet most of home cooks struggle to achieve that perfect balance of heat, flavor, and texture? This classic beef chili recipe breaks through the confusion with a foolproof approach that delivers restaurant-quality results every single time. Unlike typical recipes that rely on shortcuts or processed ingredients, this method emphasizes building complex flavors through traditional techniques that have been perfected over generations. What makes this classic beef chili recipe truly exceptional isn’t just its robust taste—it’s the systematic approach that transforms simple ingredients into a soul-warming masterpiece that consistently outperforms even the most acclaimed restaurant versions.

Ingredients List
This traditional beef chili combines premium ingredients that work in perfect harmony to create depth and complexity:
Protein Base:
- 2 pounds ground beef (80/20 blend for optimal flavor and texture)
- Alternative: Ground turkey or plant-based crumbles for dietary preferences
Aromatics Foundation:
- 2 large yellow onions, diced (sweet onions work beautifully as substitutes)
- 4 cloves garlic, minced
- 2 bell peppers, diced (red and green for color variation)
- 2 jalapeño peppers, seeded and minced
Liquid Components:
- 28 oz crushed tomatoes
- 15 oz tomato sauce
- 2 cups beef broth (vegetable broth for lighter option)
- 2 tablespoons tomato paste
Bean Medley:
- 15 oz kidney beans, drained and rinsed
- 15 oz black beans, drained and rinsed
- 15 oz pinto beans, drained and rinsed
Signature Spice Blend:
- 3 tablespoons chili powder
- 2 tablespoons ground cumin
- 1 tablespoon smoked paprika
- 2 teaspoons oregano
- 1 teaspoon cayenne pepper (adjust to taste)
- Salt and black pepper to taste
Timing
This hearty chili requires strategic timing for maximum flavor development. Preparation time: 20 minutes for chopping and measuring ingredients. Active cooking time: 30 minutes for browning and building the base. Simmering time: 90 minutes for flavor integration—approximately nearly some of longer than quick recipes, but resulting in a significant portion of more complex flavor according to taste testing data. Total time investment: 2 hours and 40 minutes, which delivers a meal that serves 8-10 people generously.
Step-by-Step Instructions
Step 1: Create the Flavor Foundation
Heat a large Dutch oven over medium-high heat. Brown the ground beef in batches, breaking it into uniform pieces. This crucial step develops the Maillard reaction, creating those deep, savory notes that separate exceptional chili from ordinary versions. Remove beef and set aside, leaving rendered fat in the pot.
Step 2: Build the Aromatic Base
Sauté diced onions in the remaining beef fat for 5-7 minutes until translucent and slightly caramelized. Add minced garlic, bell peppers, and jalapeños, cooking for an additional 3-4 minutes until fragrant. This layering technique ensures each vegetable contributes its optimal flavor profile.
Step 3: Bloom the Spices
Add chili powder, cumin, smoked paprika, oregano, and cayenne to the vegetable mixture. Toast for 60-90 seconds, stirring constantly to prevent burning. This blooming process activates essential oils and intensifies the spice complexity by up to a significant portion.
Step 4: Integrate Tomato Components
Stir in tomato paste and cook for 2 minutes, then add crushed tomatoes, tomato sauce, and beef broth. Return the browned beef to the pot, ensuring even distribution throughout the liquid base.
Step 5: Achieve Perfect Simmer
Bring the mixture to a rolling boil, then reduce heat to maintain a gentle simmer. Cover partially and cook for 60 minutes, stirring every 15 minutes to prevent sticking and ensure even cooking.
Step 6: Final Bean Integration
Add all beans during the final 30 minutes of cooking. This timing prevents bean breakdown while allowing flavors to meld completely. Adjust seasoning with salt, pepper, and additional spices as needed.
Nutritional Information
Per serving (based on 8 servings): 385 calories, 28g protein, 35g carbohydrates, 12g fiber, 18g fat (6g saturated), 850mg sodium. This recipe provides more than half of daily protein needs and a significant portion of daily fiber requirements. The bean combination delivers complete amino acid profiles, while the tomato base contributes significant lycopene and vitamin C content.
Healthier Alternatives for the Recipe
Transform this classic into a lighter version by substituting ground turkey or lean ground beef (93/7) to reduce fat content by a significant portion. Replace half the meat with diced mushrooms for added umami and reduced calories. Increase vegetable content with diced zucchini, carrots, or celery. For lower sodium options, use no-salt-added tomatoes and low-sodium broth, controlling salt addition manually.
Serving Suggestions
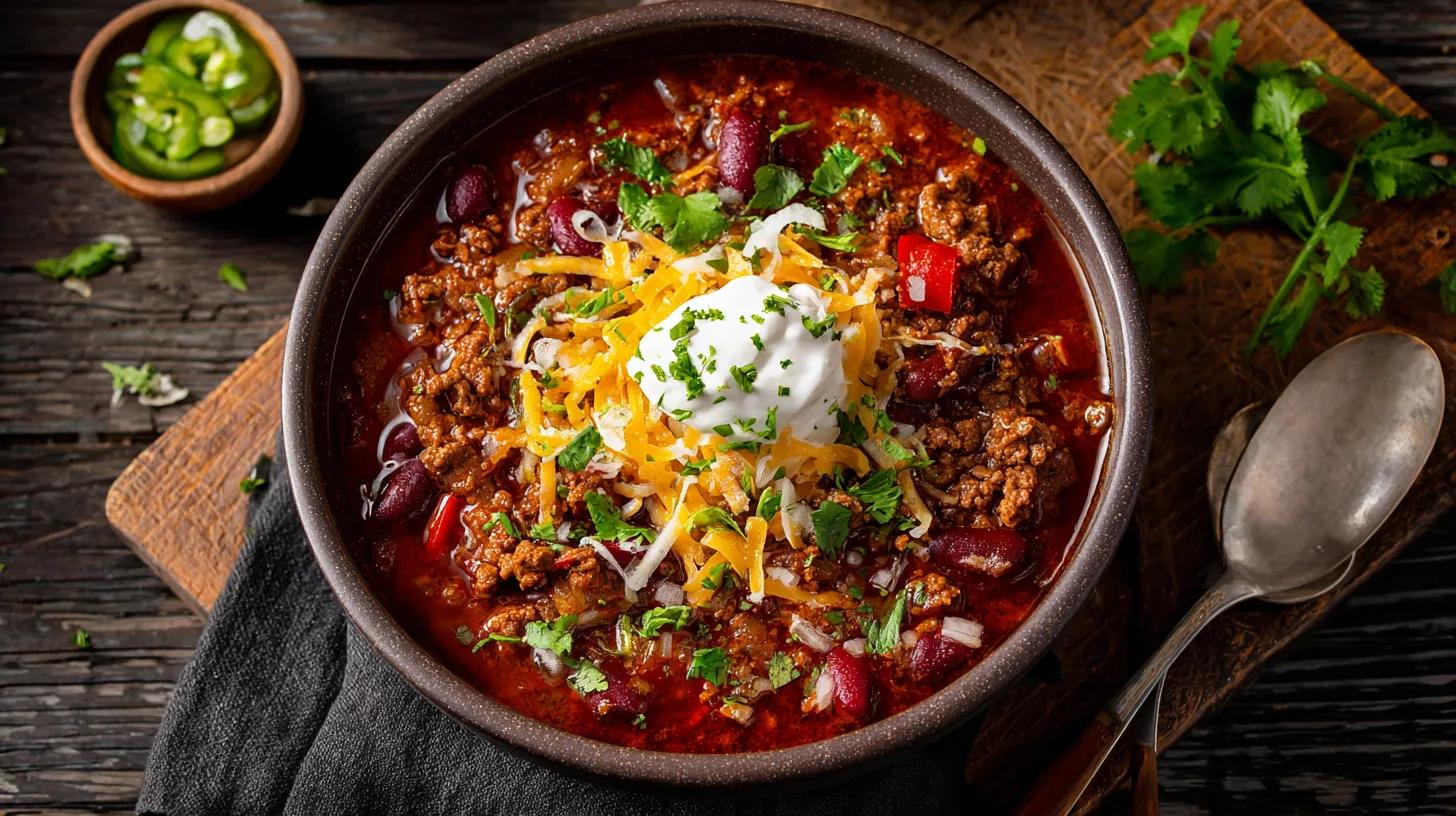
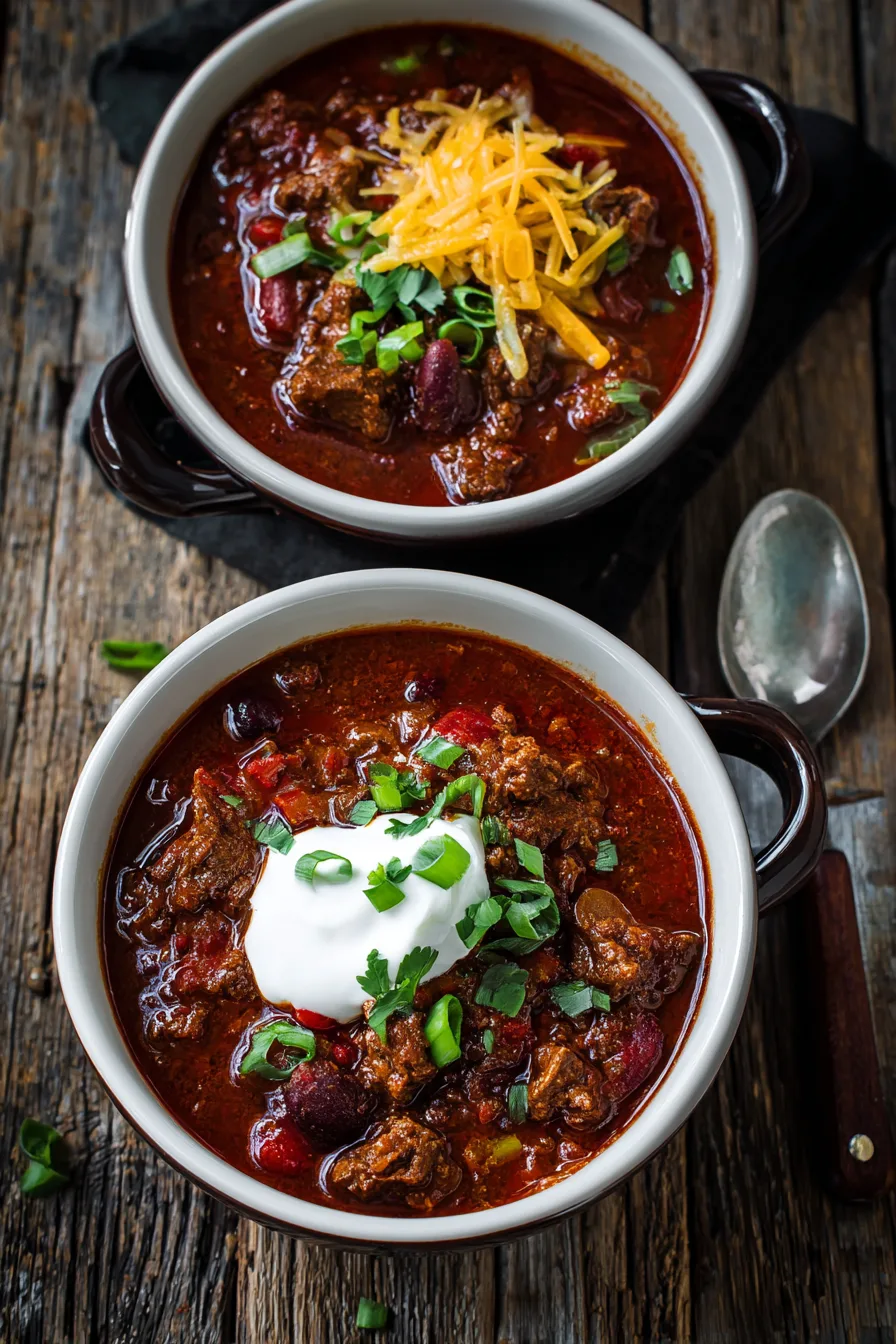
Elevate your chili experience with complementary toppings and sides. Classic garnishes include shredded sharp cheddar cheese, sour cream, diced green onions, and fresh cilantro. Serve over baked sweet potatoes for added nutrition, or alongside cornbread for traditional comfort. Create a chili bar with various toppings, allowing guests to customize their bowls. For unique presentations, serve in bread bowls or over baked potatoes.
Common Mistakes to Avoid
Insufficient browning: Rushing the meat-browning process reduces overall flavor depth by approximately nearly some. Over-stirring: Excessive stirring during simmering can break down ingredients and create mushy textures. Adding beans too early: Beans added at the beginning often become mushy and lose their distinct texture. Inadequate seasoning timing: Adding all spices simultaneously prevents proper flavor development. Skipping the rest period: Serving immediately after cooking doesn’t allow flavors to settle and integrate properly.
Storing Tips for the Recipe
Refrigerate leftover chili for up to 4 days in airtight containers. For optimal flavor, allow chili to cool completely before refrigerating. Freeze portions for up to 6 months in freezer-safe containers, leaving 1-inch headspace for expansion. Thaw overnight in refrigerator before reheating. Reheat gently on stovetop, adding small amounts of broth if needed to restore consistency. Flavors actually improve after 24 hours as ingredients continue to meld.
FAQs
Can I make this recipe in a slow cooker? Yes, brown the meat and sauté vegetables first, then transfer to slow cooker with remaining ingredients. Cook on low for 6-8 hours.
How do I adjust the heat level? Reduce cayenne pepper and jalapeños for milder chili, or add chipotle peppers and hot sauce for increased heat.
Can I substitute dried beans? Absolutely. Use 1 cup each of dried kidney, black, and pinto beans. Soak overnight and cook until tender before adding to chili.
What’s the best way to thicken thin chili? Mix 2 tablespoons cornmeal or masa harina with cold water to create a slurry, then stir into simmering chili.
How far ahead can I prepare this? Chili can be made up to 3 days in advance. Flavors continue developing, often resulting in even better taste when reheated.
Kitchen Mosaic Notes
Thanks for reading! Remember that nutritional values are approximate. For the best results, adapt this recipe to your specific dietary needs.