
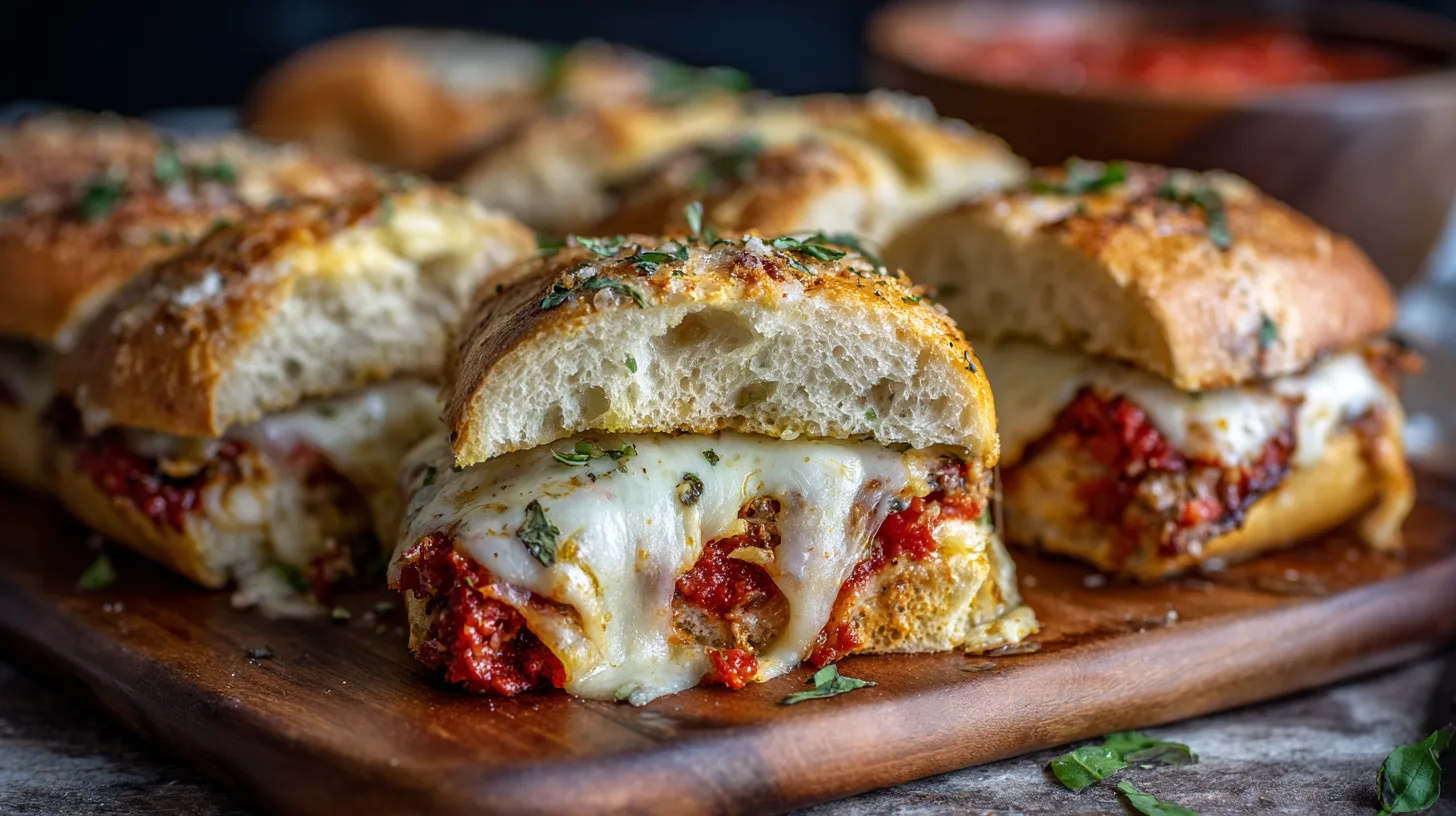
Did you know that the average American consumes over 300 sandwiches per year, yet most of report feeling unsatisfied with their lunch choices? The solution might lie in transforming the humble sandwich into something extraordinary. Baked Italian Grinder Sandwiches represent the perfect fusion of convenience and gourmet flavors, elevating your typical lunch routine into a restaurant-quality experience. These hearty, oven-baked creations combine traditional Italian flavors with the satisfying crunch of perfectly toasted bread, delivering a meal that’s both comforting and sophisticated.
Ingredients List
Creating the perfect Baked Italian Grinder Sandwiches requires quality ingredients that work harmoniously together. Here’s your shopping list for four generous servings:
For the Sandwich Base:
- 4 Italian sub rolls or hoagie buns (6-8 inches each)
- 2 tablespoons olive oil for brushing
- 2 cloves garlic, minced
Meat Selection:
- 8 oz sliced salami (substitute: turkey pepperoni for lighter option)
- 8 oz sliced ham (substitute: turkey ham or prosciutto)
- 6 oz sliced pepperoni (substitute: turkey pepperoni)
Cheese Components:
- 8 oz provolone cheese, sliced (substitute: mozzarella or fontina)
- 4 oz fresh mozzarella, sliced (substitute: burrata for extra creaminess)
- 2 tablespoons grated Parmesan cheese
Vegetables and Flavor Enhancers:
- 1 large tomato, sliced thick
- 1 medium red onion, thinly sliced
- 1 bell pepper (red or yellow), sliced
- 4 tablespoons Italian dressing (substitute: balsamic vinaigrette)
- 2 tablespoons Italian seasoning blend
- Fresh basil leaves for garnish
- Salt and black pepper to taste
Timing
The beauty of Baked Italian Grinder Sandwiches lies in their efficient preparation timeline. Total time investment is just 35 minutes—that’s a significant portion of faster than most homemade pizza recipes with comparable satisfaction levels.
Preparation Time: 15 minutes
Baking Time: 15-18 minutes
Resting Time: 2-3 minutes
Total Time: 35 minutes
This timing allows you to prepare a gourmet meal during your lunch break or quickly satisfy evening cravings without extensive kitchen commitment.
Step-by-Step Instructions
Preheat and Prepare Your Workspace
Set your oven to 400°F (200°C) and line a large baking sheet with parchment paper. This temperature ensures optimal cheese melting while achieving that coveted crispy exterior. Mix minced garlic with olive oil in a small bowl—this aromatic blend will elevate your bread’s flavor profile significantly.
Prepare the Bread Foundation
Slice each sub roll horizontally, creating a top and bottom half. Brush the cut sides generously with your garlic-olive oil mixture. This step prevents sogginess while infusing Mediterranean flavors into every bite. Place the bottom halves on your prepared baking sheet, cut-side up.
Layer the Meats Strategically
Begin with salami as your base layer—its robust flavor anchors the entire sandwich. Follow with ham, then pepperoni, creating overlapping layers that ensure even distribution. This sequencing prevents any single flavor from overwhelming the others while maximizing taste in every bite.
Add the Cheese Elements
Place provolone slices over the meat, followed by fresh mozzarella pieces. The combination of aged and fresh cheeses creates textural complexity that food scientists recognize as crucial for satisfaction. Sprinkle Parmesan cheese over the top for an extra umami boost.
Incorporate Fresh Vegetables
Layer tomato slices, red onion, and bell pepper strips over the cheese. Drizzle Italian dressing evenly across all vegetables—this adds moisture and tangy brightness that cuts through the rich meats and cheeses.
Season and Top
Sprinkle Italian seasoning, salt, and pepper over the entire assembly. Place the top halves of the rolls over the filling, creating complete sandwiches. Brush the tops with remaining garlic oil for golden, crispy results.
Bake to Perfection
Bake for 15-18 minutes until the cheese is bubbly and the bread tops are golden brown. The internal temperature should reach 165°F for food safety. Allow to rest for 2-3 minutes before serving—this prevents the filling from sliding out when cut.
Nutritional Information
Each Baked Italian Grinder Sandwich provides approximately:
- Calories: 680-720
- Protein: 38-42g (most of daily value)
- Carbohydrates: 45-50g
- Fat: 38-42g
- Fiber: 3-4g
- Sodium: 1,890-2,100mg
- Calcium: 450mg (a significant portion of daily value)
These sandwiches deliver substantial protein content, making them ideal for active individuals or those seeking satisfying meals that maintain energy levels for 4-5 hours post-consumption.
Healthier Alternatives for the Recipe
Transform your Baked Italian Grinder Sandwiches into nutritionally optimized versions without sacrificing flavor:
Bread Modifications: Substitute whole grain or multigrain sub rolls to increase fiber content by more than half of and add B-vitamins. Alternatively, use cauliflower or portobello mushroom caps for low-carb versions.
Meat Alternatives: Replace traditional deli meats with turkey or chicken varieties to reduce saturated fat by a significant portion. Plant-based options like seasoned tempeh or marinated mushrooms provide protein while accommodating vegetarian preferences.
Cheese Adjustments: Use part-skim mozzarella and reduced-fat provolone to decrease calories by nearly some of while maintaining calcium benefits. Nutritional yeast adds cheesy flavor for vegan adaptations.
Vegetable Enhancements: Double the vegetable content and add spinach, arugula, or roasted zucchini to increase antioxidants and create more balanced nutritional profiles.
Serving Suggestions
Baked Italian Grinder Sandwiches pair beautifully with various accompaniments that complement their rich, savory profile:
Serve alongside crispy sweet potato fries or a Mediterranean quinoa salad for balanced nutrition. Italian wedding soup or minestrone creates a comforting combination perfect for cooler weather. For lighter options, pair with arugula salad dressed with lemon vinaigrette or roasted vegetable medley.
Consider cutting sandwiches into smaller portions for party appetizers or game-day gatherings. They’re equally impressive served on wooden boards with olives, pickled vegetables, and artisanal mustards for elevated presentations.
Common Mistakes to Avoid
Overstuffing: Resist the temptation to overload with ingredients. Excessive filling creates messy eating experiences and prevents proper heating throughout.
Skipping the Rest Period: Cutting immediately after baking causes filling displacement. The 2-3 minute rest allows cheese to set slightly while maintaining optimal temperature.
Inadequate Seasoning: Don’t underestimate seasoning’s impact. Each layer should be lightly seasoned for maximum flavor development.
Wrong Baking Temperature: Temperatures above 425°F risk burning bread before cheese melts completely. Temperatures below 375°F result in soggy textures.
Storing Tips for the Recipe
Refrigerator Storage: Wrap cooled sandwiches individually in aluminum foil and refrigerate for up to 3 days. Reheat in 350°F oven for 8-10 minutes to restore crispiness.
Freezer Storage: Prepare sandwiches through the assembly stage, wrap tightly, and freeze for up to 2 months. Bake directly from frozen, adding 5-8 minutes to cooking time.
Make-Ahead Strategy: Prepare all components separately and store in refrigerator. Assemble and bake when ready to serve for optimal freshness and texture.
FAQs
Can I make these sandwiches in an air fryer?
Yes! Cook at 375°F for 8-10 minutes, checking halfway through. This method creates extra-crispy results.
What’s the best way to prevent soggy bottoms?
Brush bread with garlic oil and avoid over-saucing. Pat tomatoes dry before layering to remove excess moisture.
Can I prepare the filling mixture in advance?
Absolutely! Combine meats and cheeses up to 24 hours ahead. Store vegetables separately to maintain freshness.
How do I know when they’re perfectly done?
Look for golden-brown tops, bubbling cheese, and an internal temperature of 165°F. The bread should sound hollow when tapped gently.
These Baked Italian Grinder Sandwiches represent the perfect intersection of convenience and gourmet satisfaction, proving that exceptional meals don’t require extensive time investments or complex techniques.
Kitchen Mosaic Notes
Thanks for reading! Remember that nutritional values are approximate. For the best results, adapt this recipe to your specific dietary needs.