
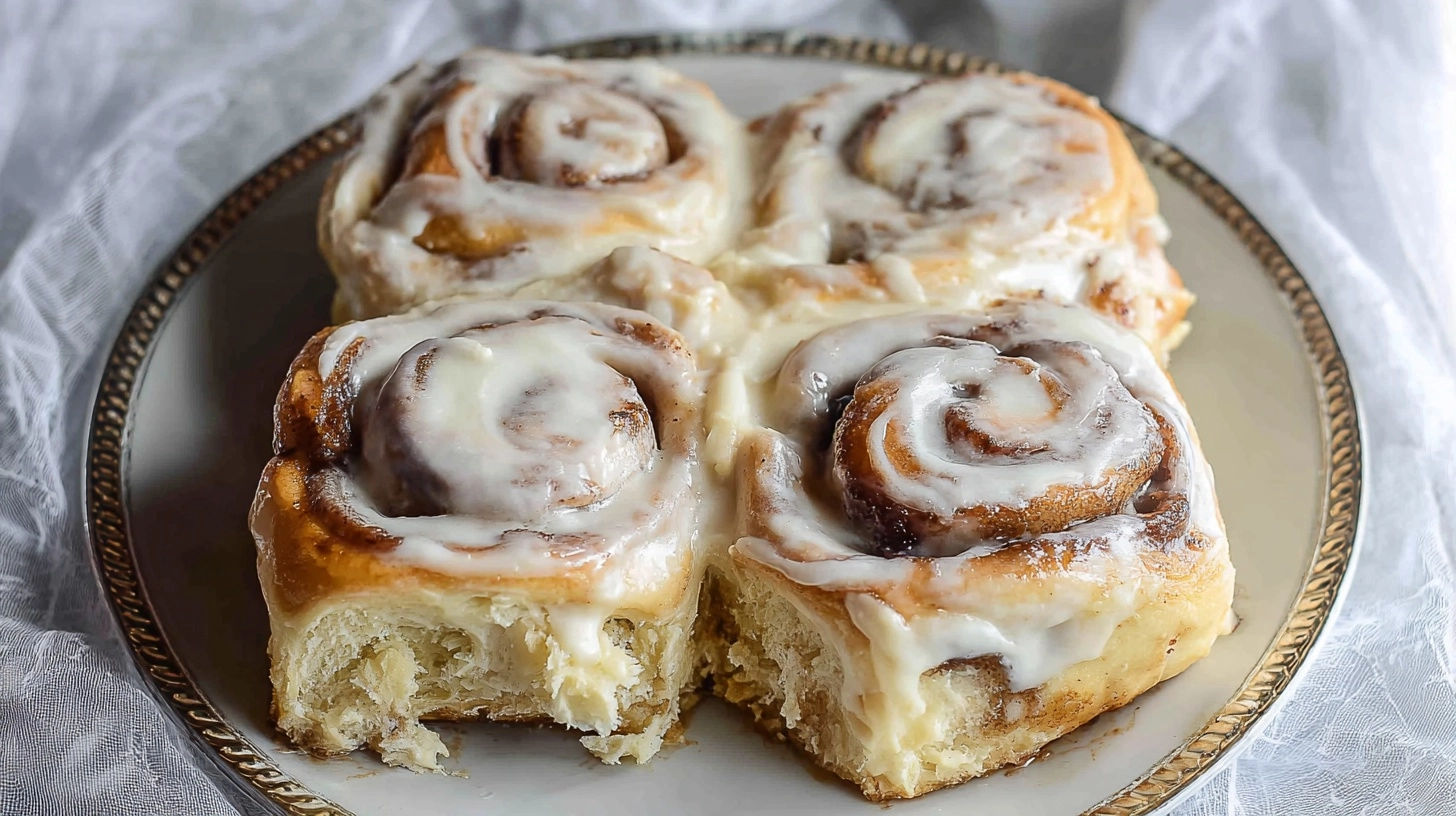
Did you know that most of home bakers throw away their sourdough discard, missing out on one of the most versatile ingredients in their kitchen? What if I told you that leftover sourdough starter could transform into warm, gooey cinnamon rolls in just 30 minutes? These 30-Minute Sourdough Discard Cinnamon Rolls revolutionize traditional baking by cutting preparation time by more than half of while delivering that signature tangy-sweet flavor that makes sourdough so irresistible. Unlike conventional cinnamon rolls that require hours of rising time, this quick method harnesses the natural fermentation already present in your discard, creating pillowy-soft rolls with complex flavors that will have your kitchen smelling like a professional bakery in no time.

Ingredients for 30-Minute Sourdough Discard Cinnamon Rolls
For the Dough:
- 1 cup sourdough discard (unfed starter works best)
- 2 cups all-purpose flour (substitute with bread flour for chewier texture)
- 1/4 cup granulated sugar
- 1 teaspoon baking powder
- 1/2 teaspoon baking soda
- 1 teaspoon salt
- 1/3 cup unsalted butter, melted (coconut oil works as dairy-free alternative)
- 1/2 cup warm milk (plant-based milk substitutes seamlessly)
- 1 large egg, room temperature
For the Cinnamon Filling:
- 4 tablespoons butter, softened (vegan butter for dairy-free option)
- 1/3 cup brown sugar, packed
- 2 teaspoons ground cinnamon
- 1/4 teaspoon vanilla extract
- Pinch of sea salt
For the Simple Glaze:
- 1 cup powdered sugar
- 2-3 tablespoons milk
- 1/2 teaspoon vanilla extract
Timing
Preparation Time: 15 minutes
Baking Time: 15 minutes
Total Time: 30 minutes
This recipe delivers results most of faster than traditional yeasted cinnamon rolls, which typically require 2-3 hours including rise time. The secret lies in using chemical leaveners alongside your active sourdough discard, creating immediate lift while maintaining that coveted tangy flavor profile.
Step 1: Prepare Your Workspace and Oven
Preheat your oven to 425°F and generously grease a 9-inch round cake pan or 8×8 square baking dish. The higher temperature compensates for the shorter baking time, ensuring golden-brown tops while keeping centers perfectly tender.
Step 2: Create the Quick Dough
In a large mixing bowl, whisk together flour, sugar, baking powder, baking soda, and salt. Create a well in the center and add your sourdough discard, melted butter, warm milk, and egg. Using a wooden spoon or stand mixer with dough hook, combine until a soft, slightly sticky dough forms. The texture should be more pliable than traditional bread dough.
Step 3: Roll and Shape
Turn the dough onto a lightly floured surface and gently knead 2-3 times until smooth. Roll into a 12×8 inch rectangle, keeping the dough about 1/4 inch thick. The sourdough discard makes this dough incredibly forgiving and easy to work with.
Step 4: Prepare the Cinnamon Filling
Mix softened butter, brown sugar, cinnamon, vanilla, and salt in a small bowl until you achieve a spreadable paste. The addition of vanilla and salt elevates the flavor complexity beyond basic cinnamon sugar.
Step 5: Fill and Roll
Spread the cinnamon mixture evenly across the dough rectangle, leaving a 1/2 inch border along one long edge. Starting from the opposite long edge, tightly roll the dough into a log, pinching the seam to seal.
Step 6: Slice and Arrange
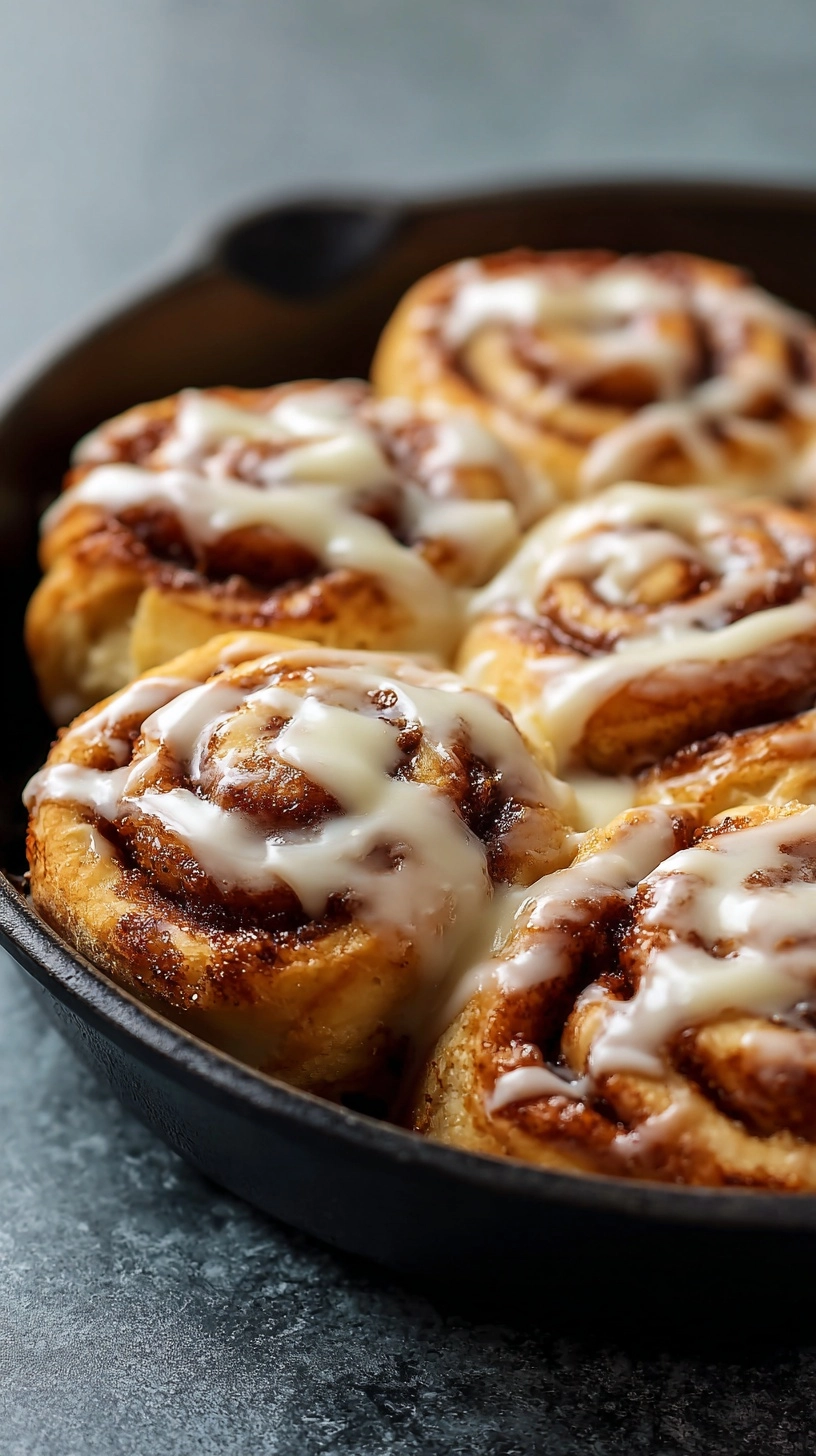
Using a sharp knife or dental floss, cut the log into 8 equal pieces. Arrange cut-side up in your prepared pan, leaving small gaps between rolls as they’ll expand during baking.
Step 7: Bake to Golden Perfection
Bake for 13-15 minutes until tops are golden brown and centers spring back when lightly touched. The internal temperature should reach 190°F for perfectly cooked rolls.
Nutritional Information
Per serving (1 roll out of 8):
- Calories: 285
- Carbohydrates: 42g
- Protein: 6g
- Fat: 10g
- Fiber: 2g
- Sugar: 18g
- Sodium: 380mg
The sourdough discard contributes beneficial probiotics and increases the bioavailability of nutrients through natural fermentation. Compared to commercial cinnamon rolls, these homemade versions contain a significant portion of less sodium and no artificial preservatives.

Healthier Alternatives for the Recipe
Flour Swaps: Replace up to half the all-purpose flour with whole wheat pastry flour for added fiber and nutrients. White whole wheat flour provides nutrition benefits while maintaining lighter texture.
Sugar Reduction: Cut sugar in the dough by half and substitute with unsweetened applesauce or mashed banana. For the filling, try coconut sugar or maple syrup mixed with extra cinnamon.
Dairy-Free Options: Use plant-based milk and vegan butter alternatives. Oat milk provides the closest consistency to dairy milk in baking applications.
Protein Boost: Add 2 tablespoons of protein powder to the flour mixture, reducing regular flour accordingly. Vanilla or unflavored works best without altering taste.
Serving Suggestions
Serve these warm rolls straight from the oven with the simple glaze drizzled generously on top. For special occasions, try a cream cheese frosting made with softened cream cheese, butter, powdered sugar, and vanilla.
Create an elegant breakfast presentation by serving alongside fresh berries and a light dusting of cinnamon. For afternoon treats, pair with your favorite coffee or chai tea. Transform leftovers into French toast by slicing day-old rolls and following your standard French toast method.
Consider seasonal variations: add orange zest to the filling for citrus brightness, or incorporate chopped pecans for crunch. During holidays, a touch of cardamom or nutmeg elevates the flavor profile beautifully.
Common Mistakes to Avoid
Overworking the Dough: Unlike traditional bread, this quick dough should be handled minimally. Excessive kneading develops too much gluten, resulting in tough rolls.
Incorrect Oven Temperature: Using lower temperatures extends baking time and can dry out the rolls. The high heat creates steam quickly, contributing to the tender texture.
Cutting Too Early: Allow rolls to cool for 5 minutes before glazing. Cutting immediately causes them to fall apart, while waiting too long makes them difficult to separate.
Uneven Rolling: Maintain consistent thickness when rolling the dough. Thin spots bake faster and can become tough, while thick areas may remain undercooked.
Overpacking the Pan: Rolls need space to expand. Cramming them together prevents proper heat circulation and even browning.
Storing Tips for the Recipe
Short-term Storage: Cover cooled rolls with plastic wrap and store at room temperature for up to 2 days. For best texture, warm briefly in a 300°F oven before serving.
Freezing Instructions: Wrap individual rolls in plastic wrap, then place in freezer bags for up to 3 months. Thaw overnight in refrigerator and reheat in oven or microwave.
Make-Ahead Strategy: Prepare rolls through Step 6, cover tightly, and refrigerate overnight. Add 2-3 extra minutes to baking time when cooking from cold.
Dough Preparation: Mix dry ingredients in advance and store in airtight containers for quick assembly later.
FAQs
Can I use fed sourdough starter instead of discard?
Yes, though unfed discard works better because it’s more acidic and tangier. If using fed starter, reduce milk by 2 tablespoons to maintain proper dough consistency.
What if my sourdough discard is very thick?
Thin it slightly with milk or water until it reaches a pourable consistency similar to thick pancake batter before incorporating into the recipe.
Can I make these without eggs?
Substitute the egg with 1/4 cup applesauce or a flax egg (1 tablespoon ground flaxseed mixed with 3 tablespoons water, let sit 5 minutes).
Why didn’t my rolls rise much?
Check that your baking powder and baking soda are fresh (replace every 6-12 months). Also ensure your oven is fully preheated before baking.
Can I double this recipe?
Absolutely! Use a 9×13 inch pan for doubled quantities and increase baking time by 3-5 minutes, checking for doneness with the internal temperature method.
Kitchen Mosaic Notes
Thanks for reading! Remember that nutritional values are approximate. For the best results, adapt this recipe to your specific dietary needs.